Set a minimum tab width for the active tab, so you’ll never lose sight of it in the sea of open tabs.
Unless you’ve enabled Scrollable Tabs, tabs on the horizontal Tab Bar will get smaller and smaller the more you open them. To be able to spot the active tab no matter how many tabs you have open, you can assign a minimum width for the active tab.
To adjust the tab width:
Go to Settings > Tabs > Tab Display > Active Tab Minimum Width.
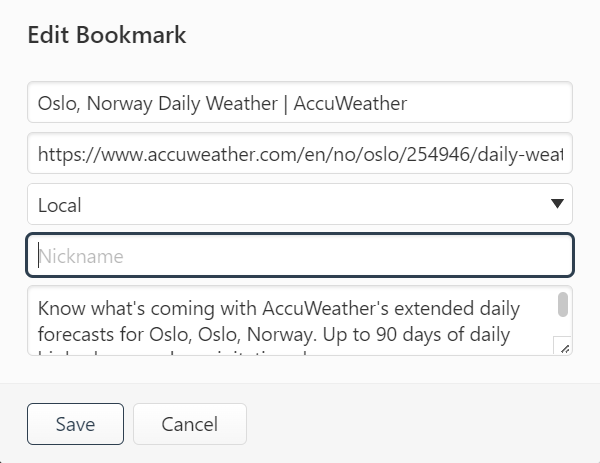
Give your bookmarks nicknames to open them quickly from the Address Bar and Quick Commands.
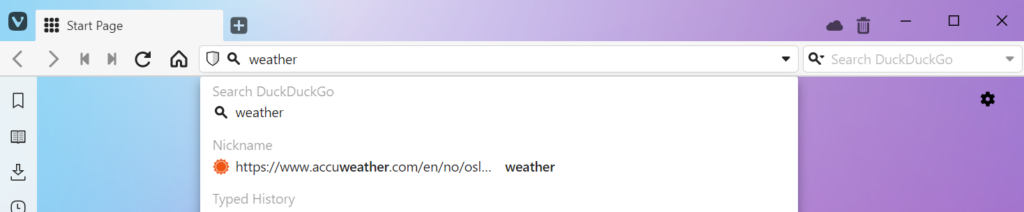
There are more ways to open bookmarks in Vivaldi than can be counted on one hand. One way is to type the bookmark nickname, instead of the long bookmark link, either in the address field on the Address Bar or in Quick Commands.
To give your bookmark a nickname, edit the bookmark and type a word you associate with the bookmark in the Nickname field.
Then, whenever you want to open the bookmarked page, just type the nickname in the address field or Quick Commands and press Enter. While typing, you can also see matching nicknames and the link they’re for in the drop down menu.
In Quick Commands, to open bookmarks as soon as you’ve finished typing their nickname, you can enable “Open Bookmarks on Nickname Match” in Settings > Quick Commands > Quick Command Options. That way you can even skip pressing Enter.
Add high quality and free images to your Vivaldi blog using Instant Images.
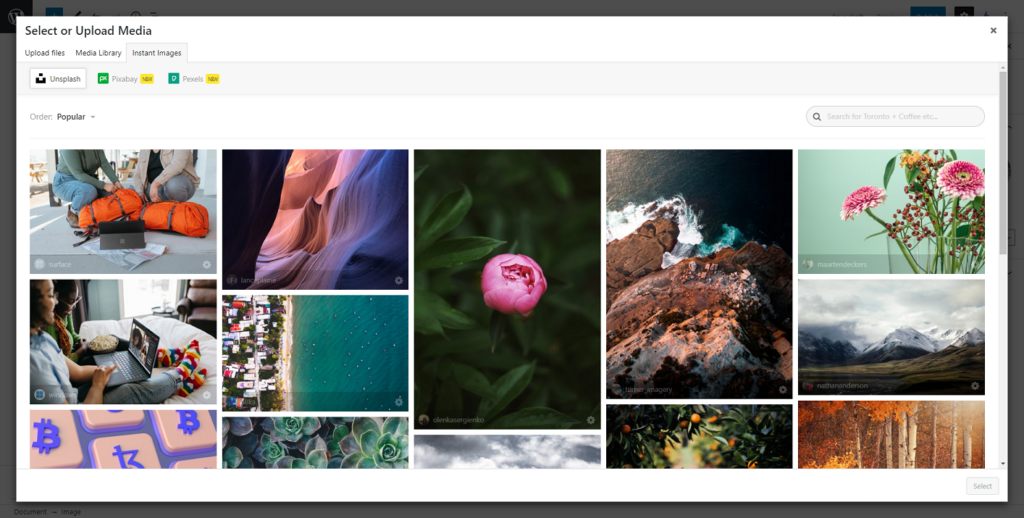
A common way to enhance blog posts is to add images to it. When you host your blog on Vivaldi.net, you can easily find and insert images to the blog using the Instant Images plugin. With the plugin you can add images from Unsplash, Pixabay and Pexels directly to your blog’s Media Library, without having to download the files to your computer first.
To add a photo to your blog:
In the post or page editor, add a new image or gallery block.
Select Media Library and go to Instant Images tab.
Search through the files from Unsplash, Pixabay and Pexels.
When you’ve found one you like, click on the image.
After it has been added to your library, clickSelect in the bottom right corner of the Media Library window to add it to the post/page.
You can also go to your blog’s Dashboard > Media > Instant Images, to browse and add images to your library.
Create a page capture title template that works for you.
When you take a screenshot of a web page using Vivaldi’s Capture tool and save it as a file on your computer, a title will be generated automatically. You can decide what information the title includes. To change the template:
Go to Settings > Webpages > Image Capture.
Add the information you want in the title using drag and drop and delete the bits that you don’t need. You can even type something in the template field yourself. 😊
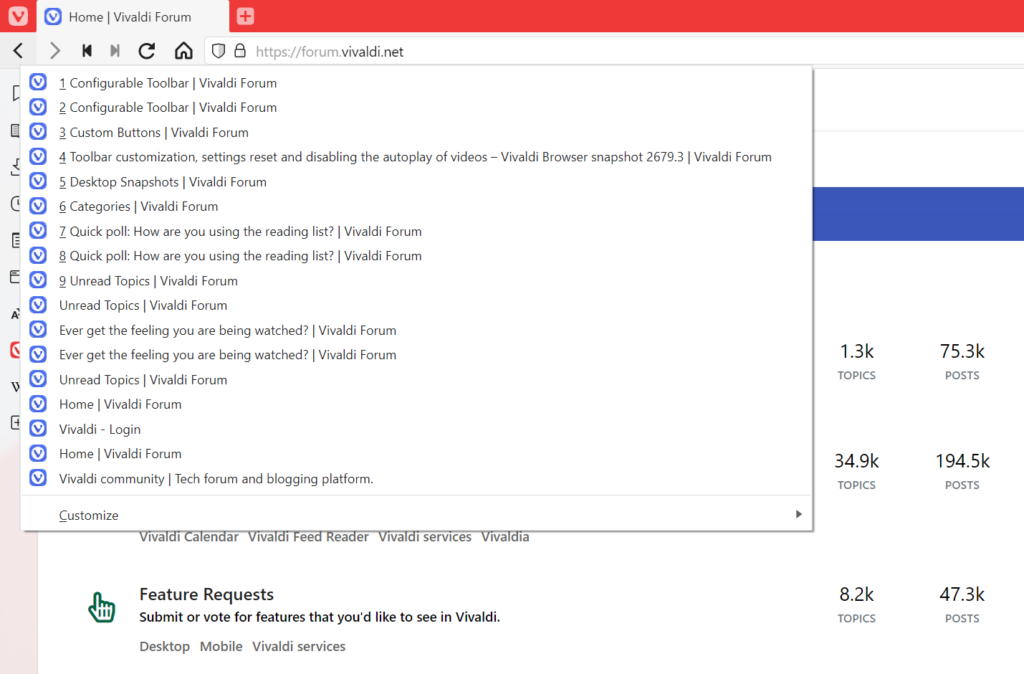
Long click on History Back and Forward buttons to view and open recently visited pages.
Instead of clicking the Back/Forward button multiple times to return to a recently visited page, you can open a list of visited pages and open the one you need directly.
Here’s how:
Long click or right-click on the Back/Forward button on the Address Bar.
In the list of entries, click on the page you want to return to.
It also works on Android! 🥳 Just tap and hold your finger on the Back/Forward button until a list with your recently visited pages opens.
Bonus tip!
On desktop, when you right-click on the list entry or hold down the Ctrl/⌘ key while clicking, the page will open in a new tab.
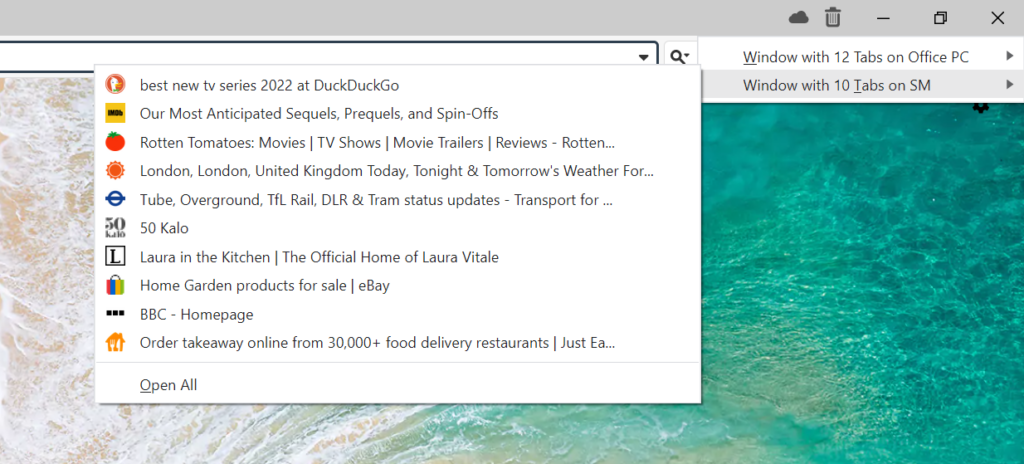
Use Sync to access tabs that are open in Vivaldi on your other devices.
With the Sync feature you can synchronize your browser data across Vivaldi on multiple devices (computers, phones, tablets and even with some cars). In addition to Bookmarks, Notes and other data, you can also sync your open Tabs.
To sync Tabs:
Log in to your Vivaldi account in Settings > Sync on all devices you want to keep in sync.
Enable either syncing of all data or at the very least syncing of History (typed URLs and open tabs).
When you want to view the tab you have open on another device, click on the Synced tabs button on the far side of the Tab Bar, select the synced device and click on the web page you want to open. On Android, open the Tab Switcher and navigate to Synced tabs from the menu at the bottom of the window. Then, tap on the web page you want to open.
Jump to the previous tab by clicking the active tab.
When you enable Minimize Active Tab in Settings > Tabs > Tab Features > Tab Cycling, you can click on the active tab on the Tab Bar to return to the previously opened tab.
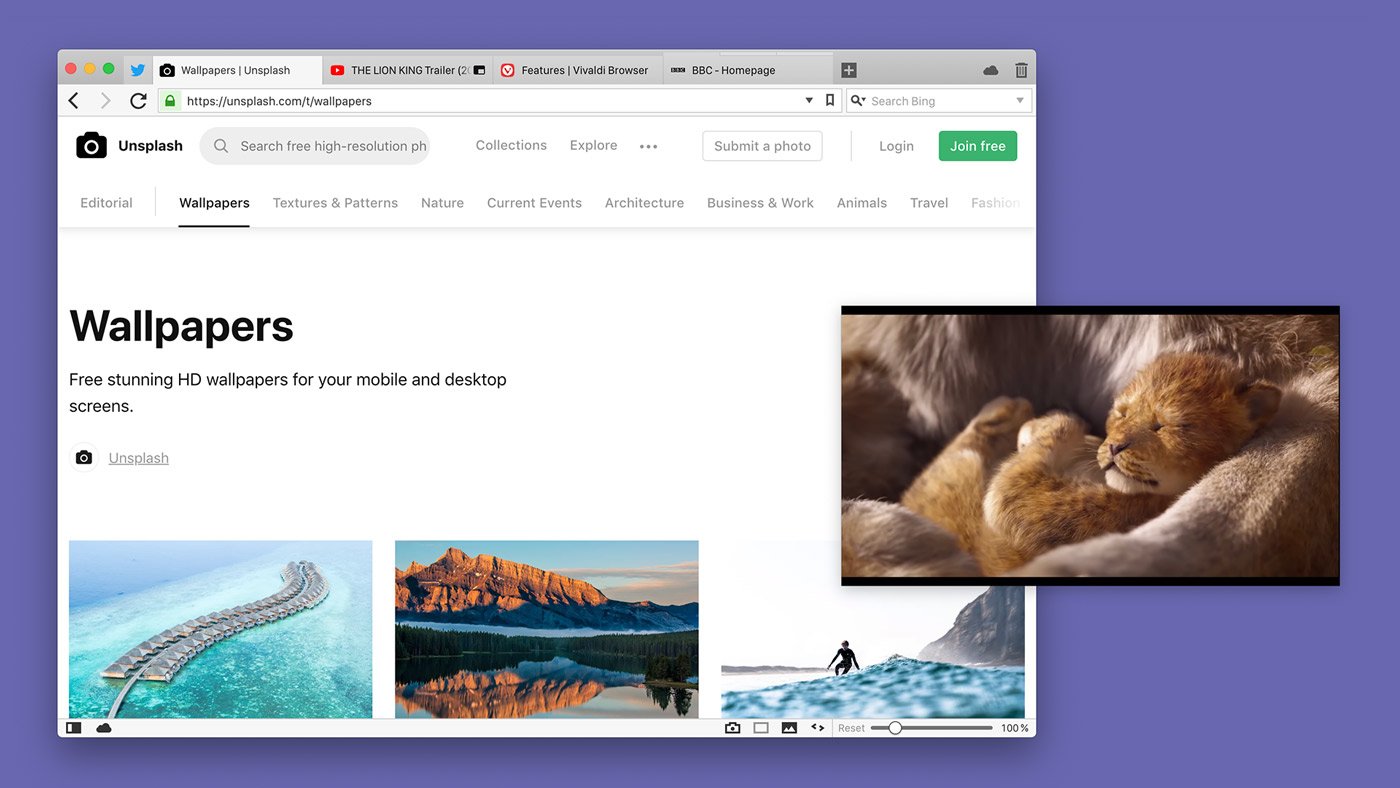
Watch videos in a floating window using the Pop Out Video feature.
The Pop Out Video feature, aka Picture-in-Picture, allows you to display HTML5 videos in a floating window so that you can continue watching the video while scrolling down a page or changing tabs.
To pop a video out from a web page:
Hover the mouse cursor over the video.
Click on the pop out video button that appears at the top edge of the video.
If you don’t see the button, check that Picture-in-Picture Button on Videos is enabled in Settings > Webpages.
Vivaldi comes with a lot of built-in functionality, but you can do some additional fine tuning by adding Extensions. Since Vivaldi is built on Chromium, most Extensions available on Chrome Web Store also work in Vivaldi.
Enable “Remove cookie warnings” in Tracker and Ad Blocker settings to hide websites’ cookie dialogs.
Since Europe’s GDPR and a few other user privacy laws don’t allow placing Cookies in your browser without consent, on your first visit, most websites ask for your permission as soon as the page has loaded. Accepting all cookies will allow the website and third parties to collect information on you and use the data in an attempt to influence your decisions later on. Until there’s better legislation, we recommend rejecting these cookies. But, depending on the website, rejecting all cookies can take minutes, slowing down your browsing significantly.
That’s why we’ve added a way to remove these cookie dialogs in the browser. To enable it:
In the list of Ad Blocking sources, look for “Remove cookie warnings (EasyList Cookie List)” and “Remove cookie warnings (I don’t care about cookies)” and enable them.
Enabling these lists will simply block the service that asks for consent, or hide the consent dialog, in the same way as it might remove a tracker or an ad. Without consent cookies cannot be placed in the browser.
We at Vivaldi believe that spying on users on the Internet using cookies and other tracking methods should be banned. To join our fight, check out https://banspying.org and share it with your friends.
Not in the mood for the current theme, but don’t feel like opening ThemesSettings either to pick a different one? No problem. In Vivaldi, you can switch to the next theme in your Theme Library with a Keyboard Shortcut.
Since the command doesn’t come with a default shortcut, you first need to assign one to it.
Go to Settings > Keyboard > View.
Find the command ‘Next Theme’ on the list.
Assign a shortcut to it.
Now, whenever you feel like changing the theme, just use the shortcut. Use it multiple times in a row to shuffle through all themes in your Theme Library.
When you group tabs into a stack, the icon and title of the most recent active tab in the stack will be shown on the Tab Bar. With many tabs and stacks, locating the tab you need can still take time. Tab Stack renaming to the rescue!!! By giving the stack a title, you can spot the right stack on the Tab Bar in no time. 💪
There are a couple of ways to rename a Tab Stack.
Option 1
Right-click on the Tab Stack.
Select Rename Tab Stack from the context menu.
Give the Tab Stack a name.
Press Enter or focus elsewhere in the browser to save the new name.
Option 2
Double-click on the Tab Stack.
Give the Tab Stack a name.
Press Enter or focus elsewhere in the browser to save the new name.
In case you have enabled minimizing tabs or closing tabs on double-click, it’s not possible to start renaming a Tab Stack with double-click.
Option 3
In the Window Panel, right-click on the Tab Stack.
Select Rename from the context menu.
Give the Tab Stack a name.
Press Enter or focus elsewhere in the browser to save the new name.
1st and 2nd Tab Stack have been renamed. 3rd Tab Stack has the title from the web page.


 Back/Forward button on the Address Bar.