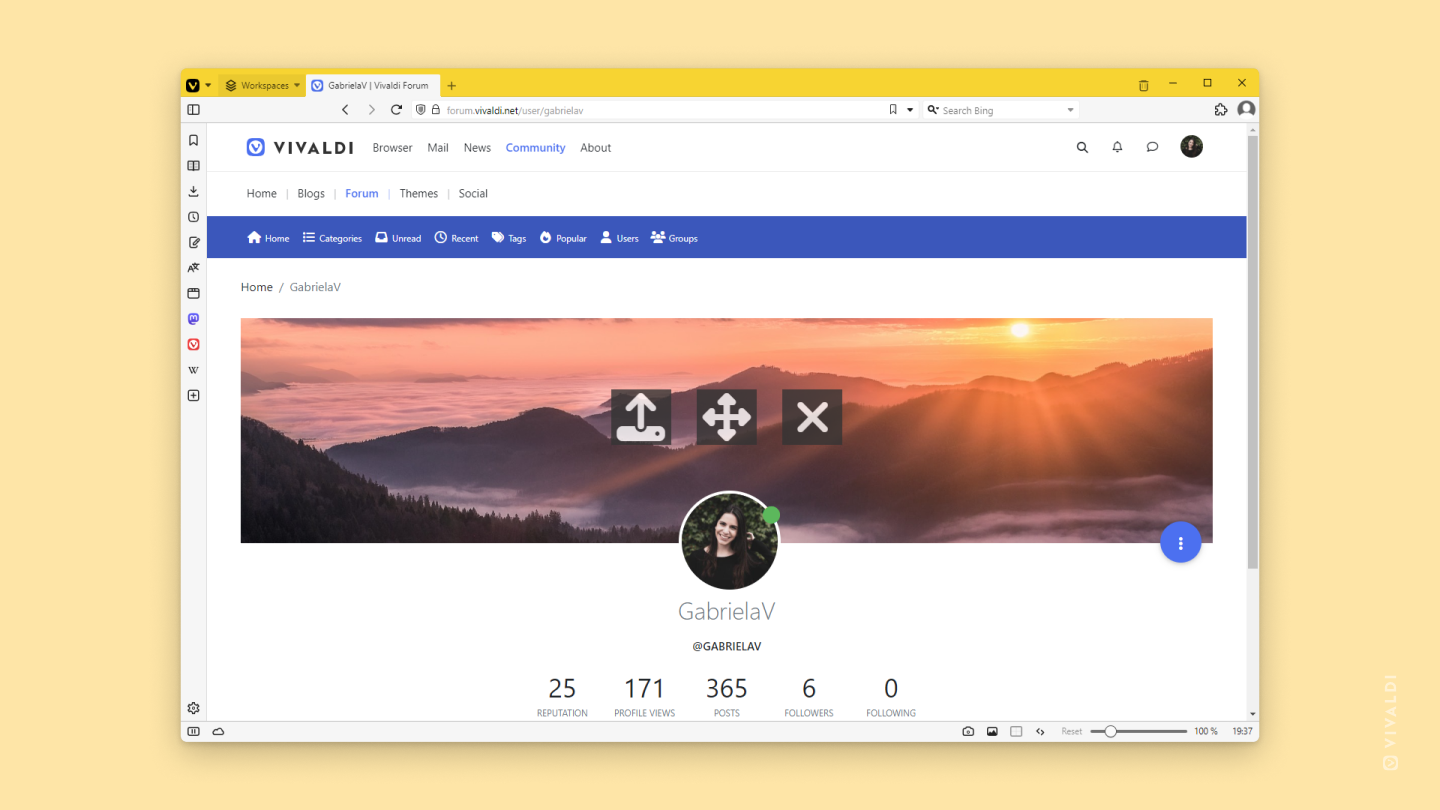
Show off your personality with a cover image on your Forum profile.
When you’ve been on the Forum for a bit and have managed to earn a couple of reputation points, you can start customizing your profile. One way to add some character to your account is by adding a cover image to your profile.
Hover over the cover image and click on the Upload button on the left.
Click on “Choose File” to select the image file.
Click Upload.
If needed, rotate, flip and/or crop the image.
Click “Crop and upload”.
If you want to adjust the image, hover over the cover again and click on the middle button with arrows to move the image. Click “Save” when you’re satisfied with the result.
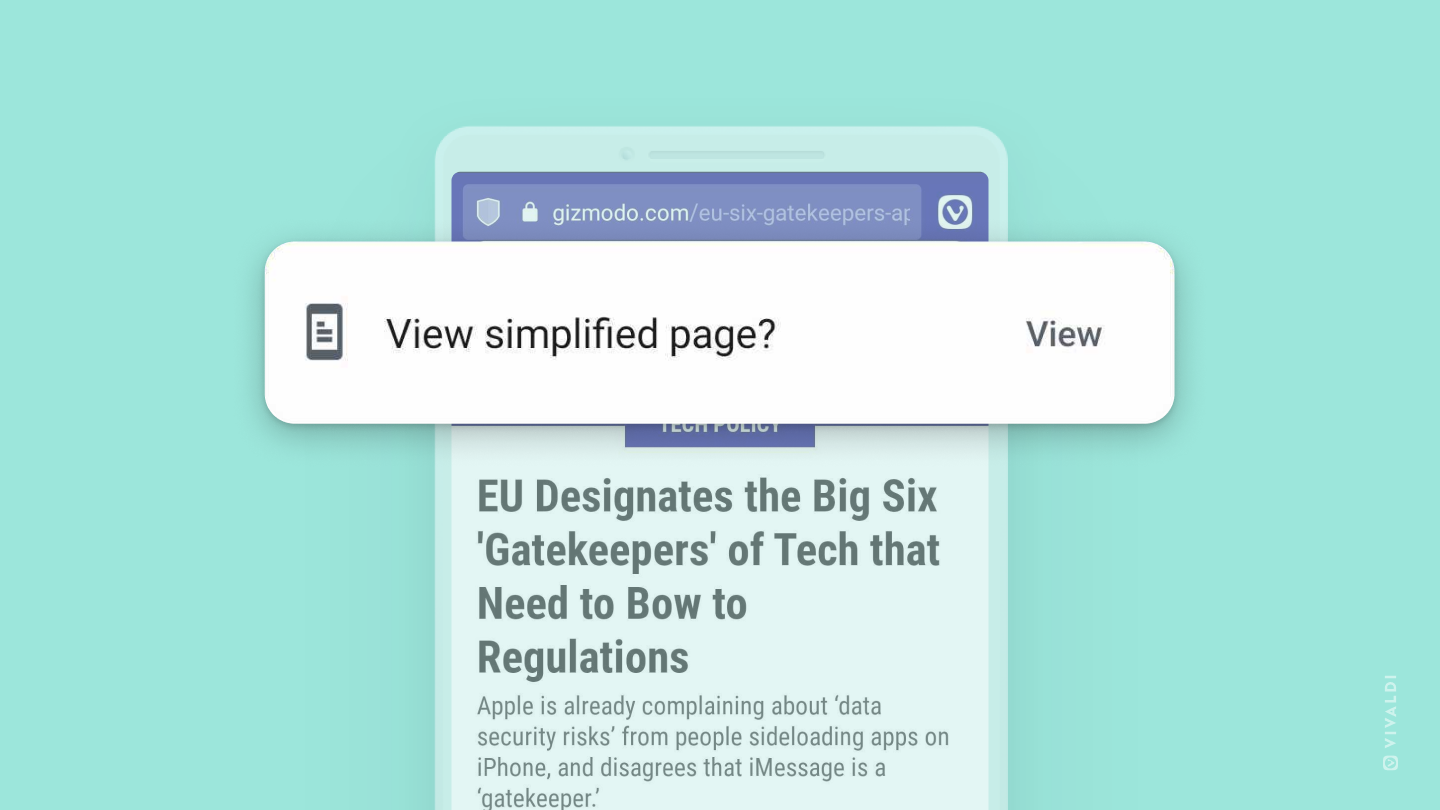
Enable Reader View for a distraction-free reading experience on Vivaldi on Android.
Web pages often come with a lot of content on them and focusing on the article you’re there to read can be a bit difficult with all the distractions. Enabling Reader View aka Simplified View on Android removes all but the main article, allowing you to focus on what’s important.
To enable Reader View on Android:
First, go to Settings > Web Pages > Accessibility.
Enable “Simplified view for web pages”.
Then find a web page with an article you’d like to read. When Reader View can be enabled, a prompt will appear on top of the page.
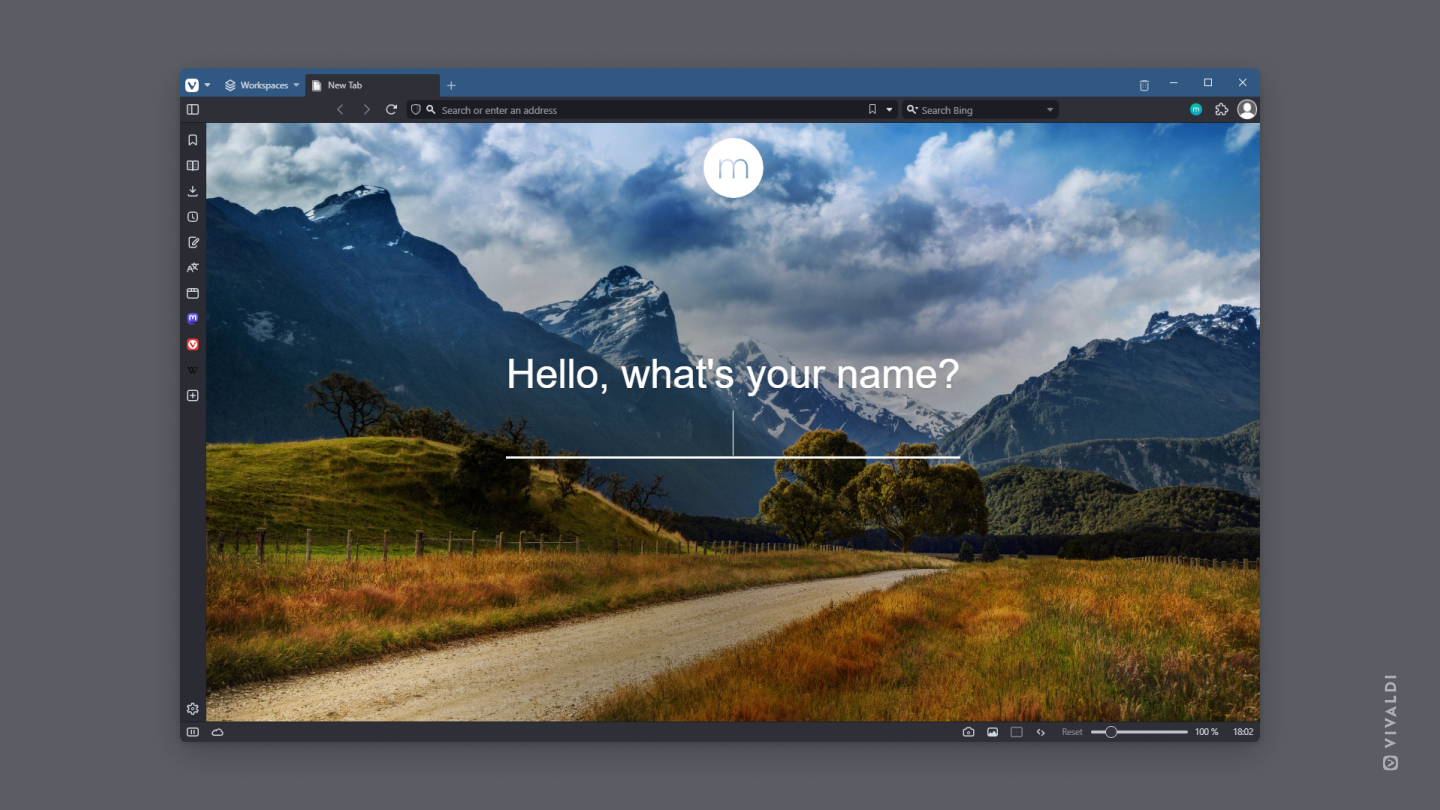
Set an Extension as the New Tab Page in your Vivaldi browser.
When you open a new tab in Vivaldi, you have various options for what’s displayed in the new tab before you navigate to a web page. You can choose between the Start Page, Home Page, Blank Page, or a web page of your choice. But there’s one more option – a New Tab Page Extension.
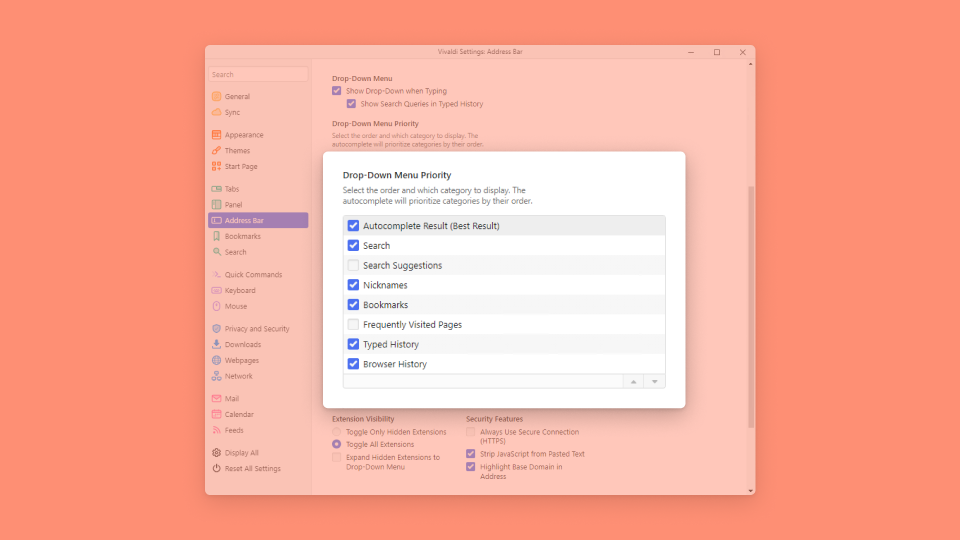
Reorder Address Field drop-down menu’s categories according to your preferences.
Do you use the Address Field search more for finding an entry in your History than for Bookmarks? Or do you want Frequently Visited Pages to be listed before Search Suggestions? In the Vivaldi browser, you can tailor the drop-down menu according to your needs.
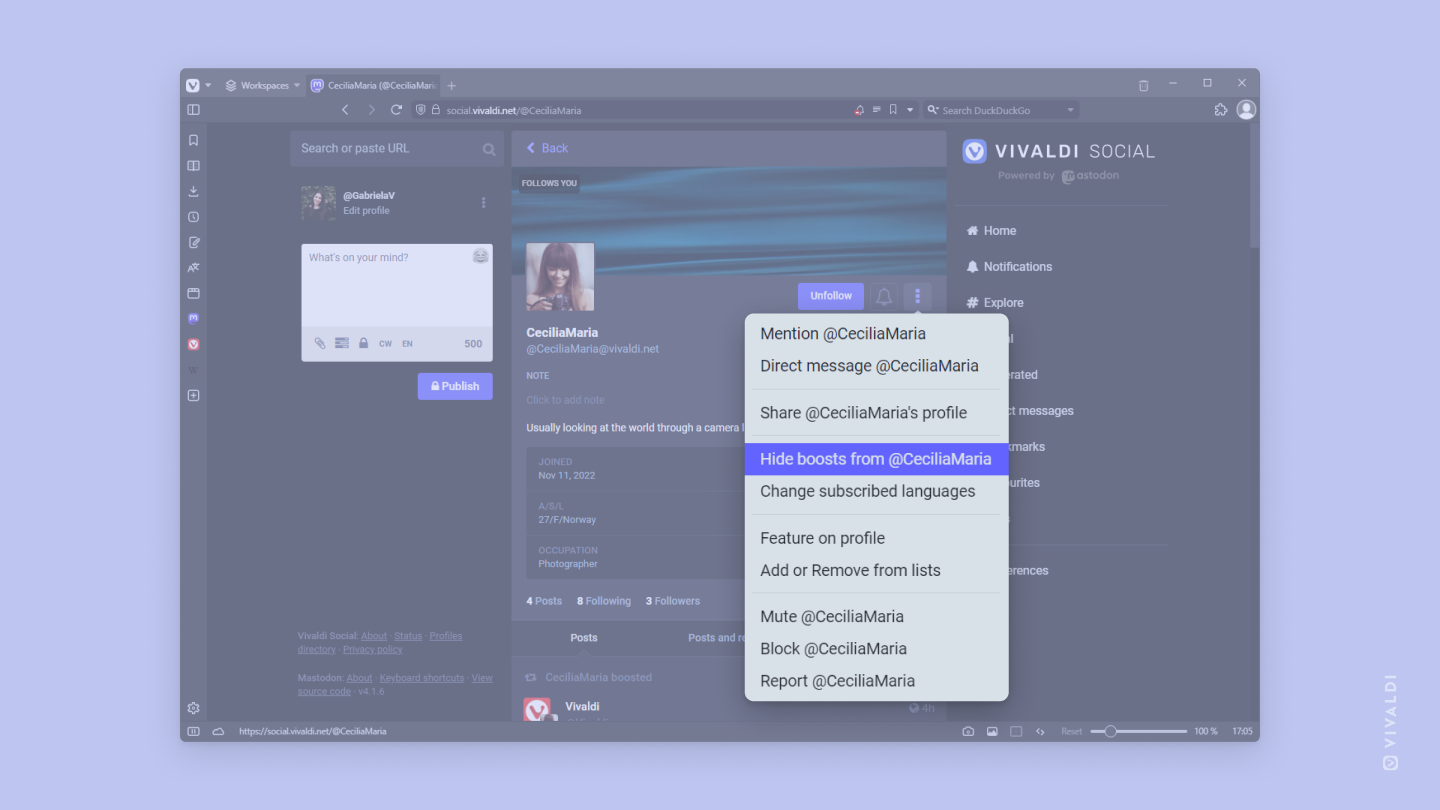
Hide boosts on Vivaldi Social to only see original posts from the account you follow.
Is an account you follow on Vivaldi Social boosting a little too many posts by other authors while you’re only interested in the posts they make? If that’s the case, you can easily hide their boosts.
To hide boosts from someone:
Go to the account’s profile.
Click on the Menu button next to the Unfollow and Notification buttons.
Select “Hide boosts from …”.
Going forward you’ll only see their own posts in your Home feed. By visiting their profile, you can still take a look at what they’ve been boosting.
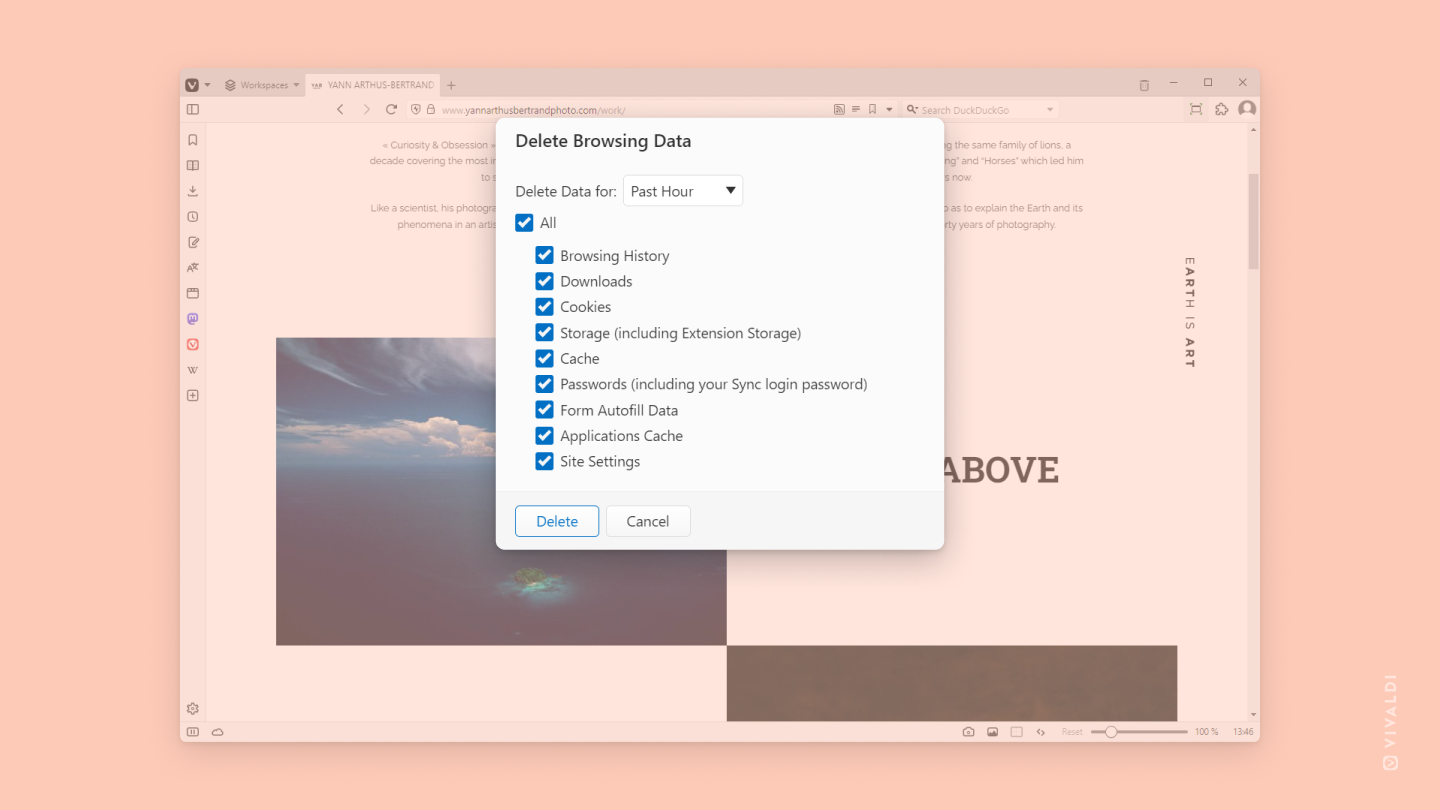
It can be convenient to find a page you recently visited or a file you downloaded, but it’s also good to get rid of unnecessary data every now and then. In Vivaldi you can choose what to delete and for what time period.
First, select one of the following ways to open the data deletion tool:
Open the Vivaldi menu > Tools > Delete Browsing Data.
Click the Clear Browsing Data button in the top-right of the History page.
Click the Clear Browsing Data button in the top-right corner of the History Panel.
Adjust tracker and ad blocking level per site from Vivaldi on Android’s Address Bar.
Let’s say you block all ads and trackers by default but want to make an exception for a specific website that you trust or, maybe, the site behaves strangely, so you want to check whether disabling the content blocker will solve the issue. In that case, while the website you want to change the blocking level for is open in the active tab:
Tap on the Content Blocker button on the left side of the Address Bar.
Choose between:
No Blocking,
Block Trackers, or
Block Trackers and Ads.
You can view and manage all websites you’ve set a separate blocking level for in Settings > Privacy > Tracker and Ad Blocking > Exceptions.
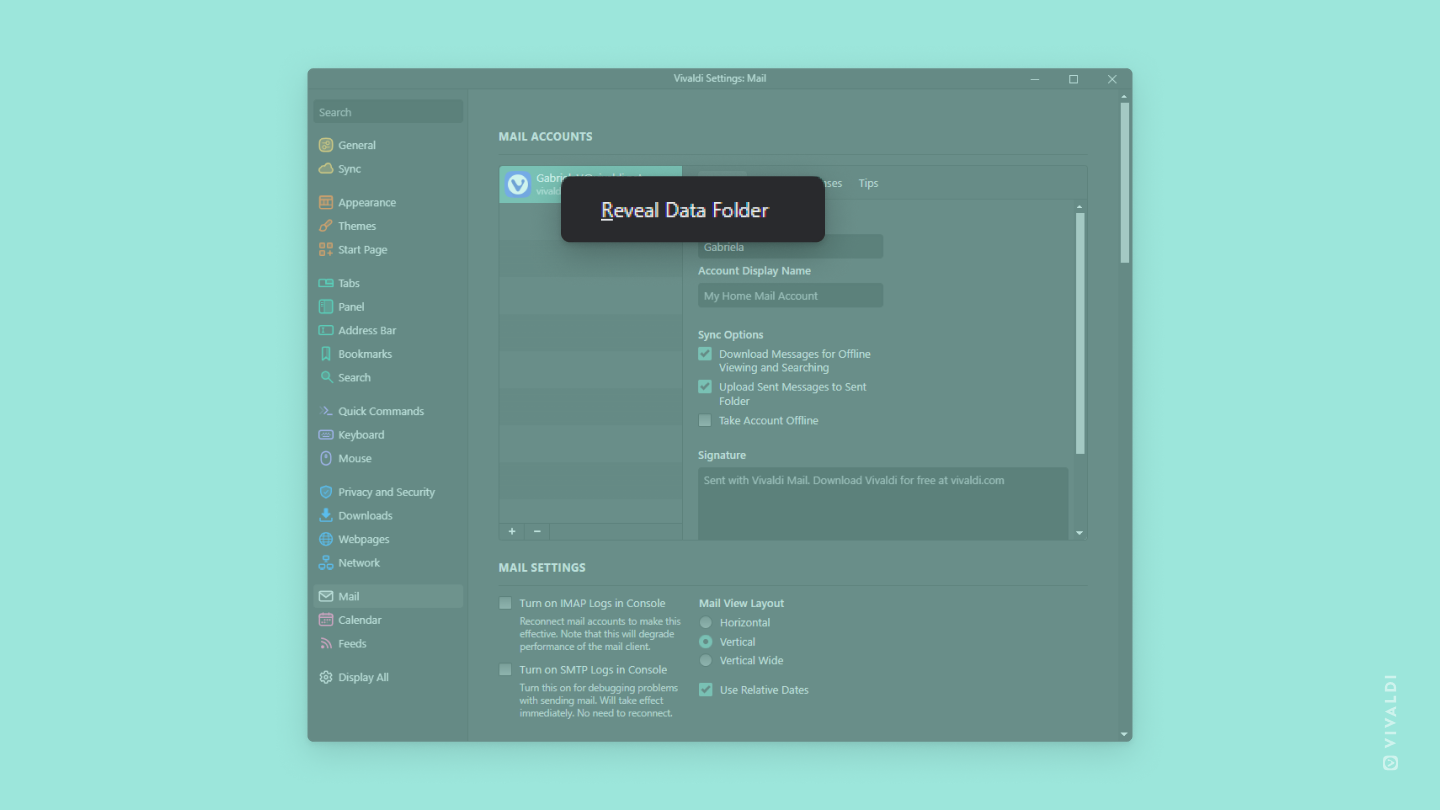
View your downloaded emails in Vivaldi browser’s profile folder.
When you open an email in Vivaldi Mail it’s downloaded to your computer. You can also enable a setting that downloads all your mail even when you haven’t opened the emails yet (see Tip #59). All downloaded emails are stored as .eml files in your browser profile.
It’ll open the folder in the browser with your emails neatly organized by date, but you can copy the folder path (e.g. C:\Users\…) and open your mail folder in a File Manager/Finder instead.
Press Space to scroll down a page and fast forward to the next one.
Whenever you’re browsing through content that’s been divided into pages (search results, online store catalog, etc.) you’ll likely do a lot of scrolling and looking for the “next page” button. In Vivaldi, you can do all of it with a single keyboard key.
By pressing Space, the page will be scrolled down a screen height at a time. Once you reach the end of the page, pressing Space will load the next page.
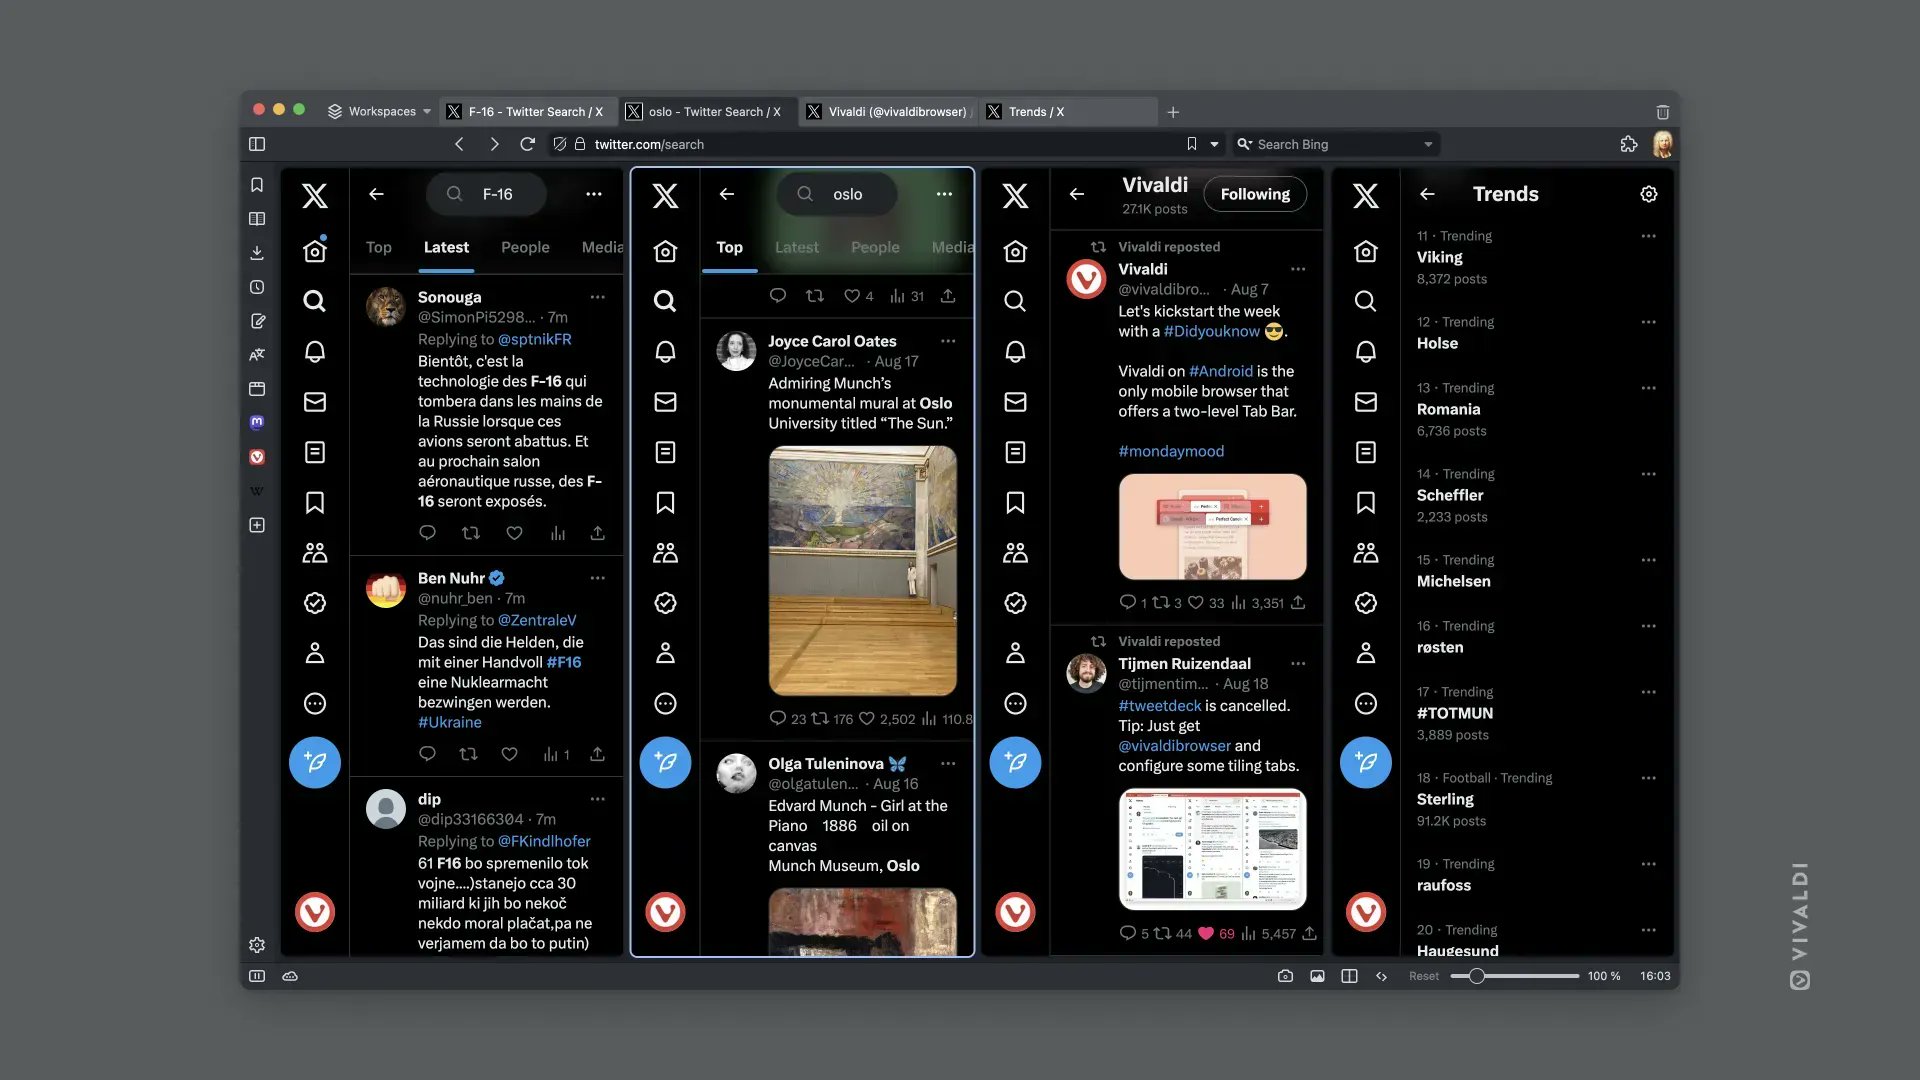
Create your own social media dashboard with tiled tabs.
Posts feed, direct messages, notifications, trending content – most social media sites offer them all and more. Some have their own (paid) dashboards for simultaneous viewing of these pages, like X’s (formerly Twitter) X Pro (formerly TweetDeck), or Mastodon’s advanced web interface. But you can also create a custom dashboard with Vivaldi’s tab tiling feature of any site you frequent.
Click and drag the edge of the Tab Bar to resize it.
Moving the Tab Bar to the side of the window (see Tip #204 for instructions) is a good way to gain some vertical space for the websites you have open. But your options don’t stop there. On the side of the window, you also have the option to set the width of the Tab Bar.
To resize the Tab Bar:
Hover the mouse cursor over the edge of the Tab Bar.
Click and drag the mouse left or right.
When you’re happy with the size, release the mouse button.
You can make the Tab Bar wider if you wish to read more of the tab titles or make it only wide enough to fit the website’s favicon.
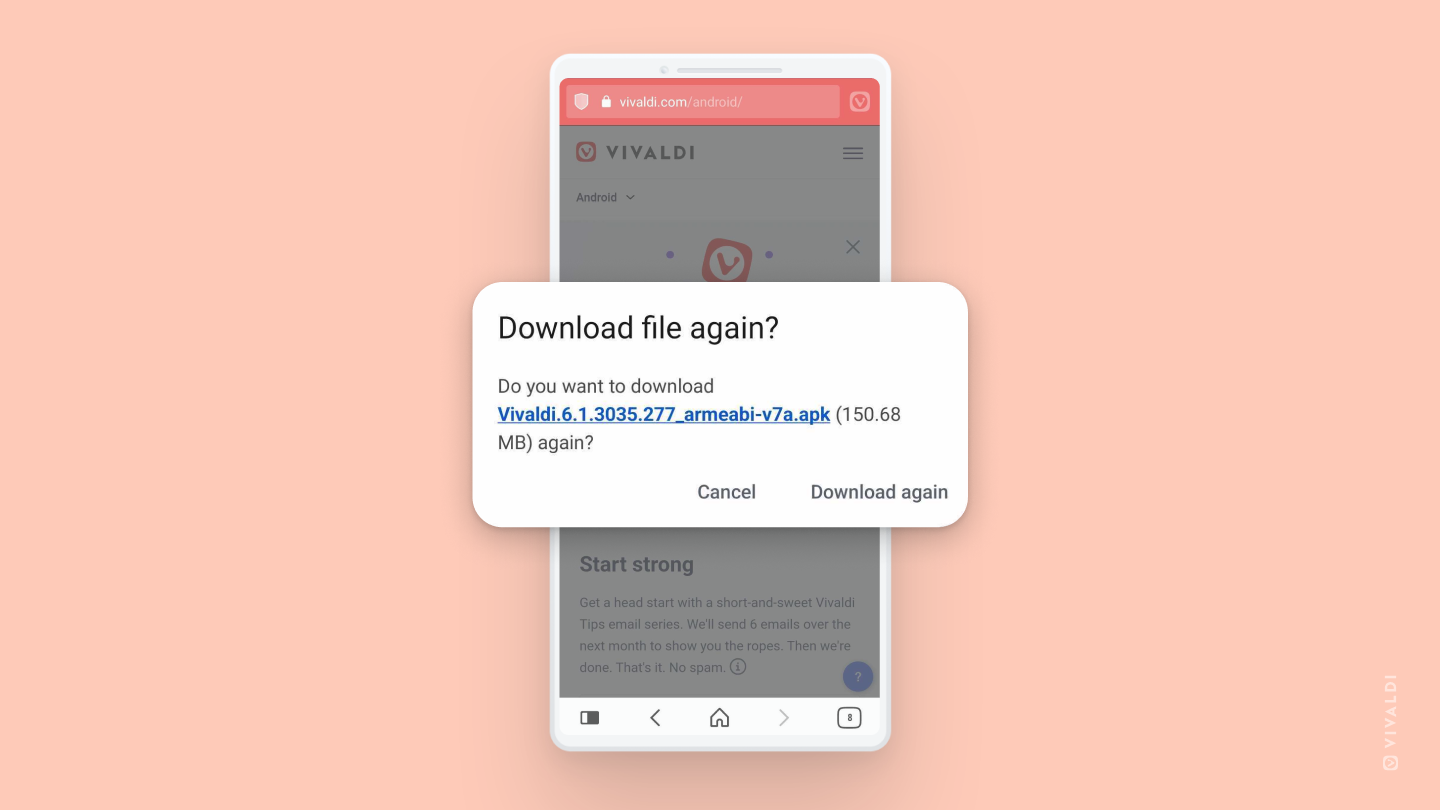
On Android, instead of downloading the file again, open it straight from the download dialog.
Whenever you start downloading a file in Vivaldi on Android that you’ve already downloaded in the past, you’ll be asked whether you want to download the file again or cancel. You’ll probably just want to open the file in that case, right?
Instead of tapping on Cancel and going to the Downloads Panel or roaming around your phone’s file folders to locate the file in question, just tap on the file title (written in blue) on the dialog. It’ll open the file for you.
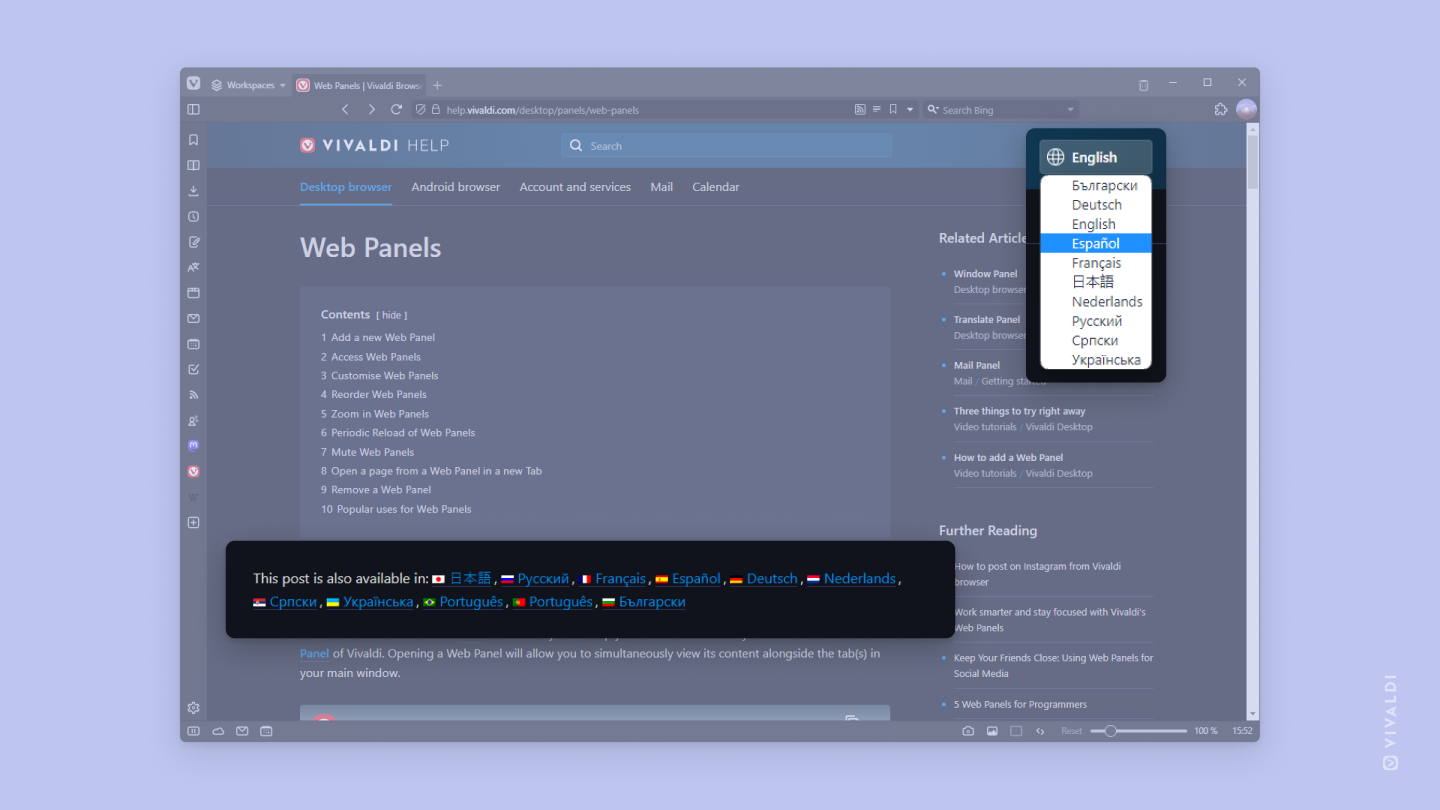
On help.vivaldi.com we have a large selection of articles teaching you about the countless features of the Vivaldi browser and services. With the help of our amazing volunteer translators, in addition to English, we’re able to offer Help pages in a few different languages.
When viewing an article, look below the title and table of contents to see in which languages the article is available in. Click on the language to switch to the translated version.
Where we have translated more than half of the articles, you can also select the language from the menu in the top right corner of the page and view the whole site in it.
In case we haven’t translated Vivaldi Help into a language you’d like to read the articles in, you can use the browser’s built-in translation tool or a translation Extension of your choice.