Tip #609

Hide spoilers and sensitive content in your Vivaldi Social posts behind content warnings.

Whether to discuss the latest hit show or a serious topic likely to trigger negative emotions in many, adding content warnings allows readers of your Vivaldi Social posts to decide whether they want to read your post or skip it.

To add content warnings:

  1. Write the post you want to share.
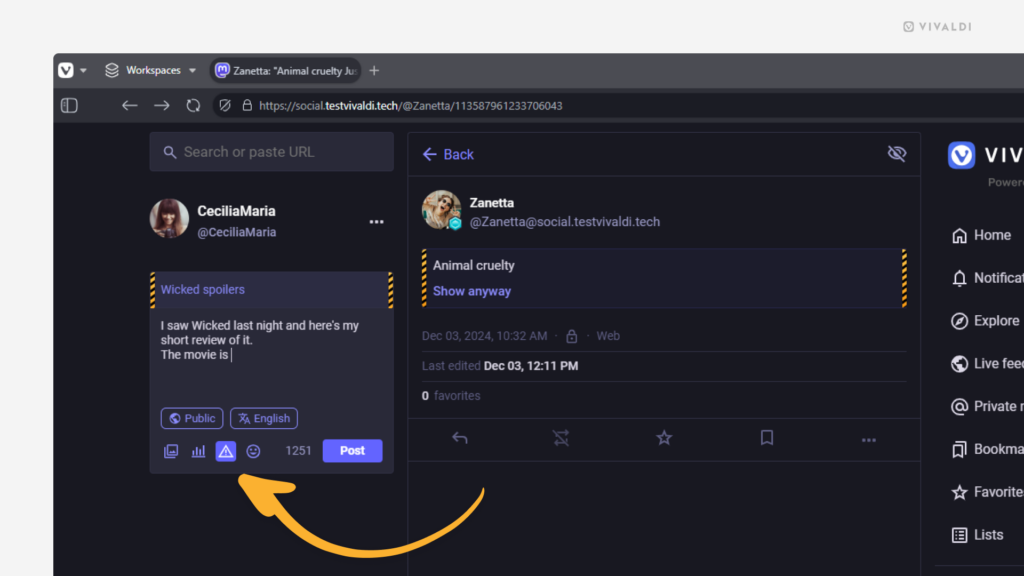
  2. On the composer’s menu at the bottom, click on “Add content warning”.
  3. Optionally, above the post’s content, add a hint to what the hidden post is about.
  4. Click “Post” to publish it.
A post with a content warning being composed in Vivaldi Social. 
An arrow points to the "Add content warning" button. 
On the right from it, a published post with a content warning is shown.

Tip #592

Explore what’s trending in the community on Vivaldi Social.

The Explore section of Vivaldi Social is a great place to discover interesting content and new accounts to follow. It shows new posts that have been boosted by others, hashtags that have been used a lot, and news or web page links that have been shared frequently. It also has a page suggesting accounts you might be interested in following.

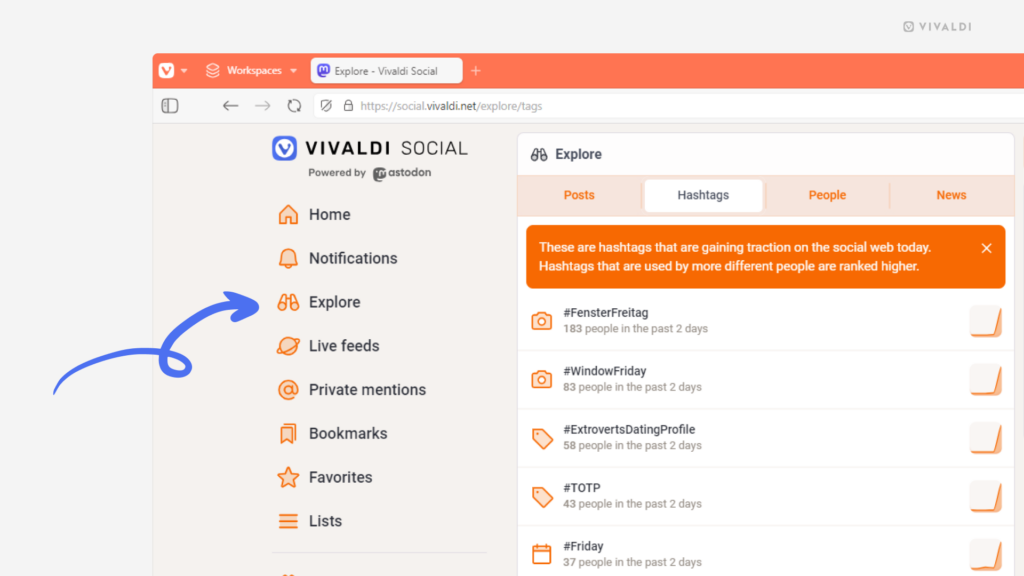
To browse trending content, locate the “Explore” link on the menu on the left or right side of the page, depending on the theme you’ve chosen (the screenshot uses the Tangerine UI theme). From the menu at the top of the middle column, you can switch between Posts, Hashtags, People, and News.

Vivaldi Social with the Tangerine UI theme. Explore section is open on the trending hashtags page. An arrow is pointing at the Explore link in the menu.

Tip #575

Review Vivaldi Social’s notification settings and filter out the ones you don’t care to see.

On Vivaldi Social, you have control over which notifications you’ll be alerted about. The rest can be put into their own folder or ignored altogether.

To review notification settings:

  1. On Vivaldi Social, go to Notifications > Show settings (top right corner of the middle panel).
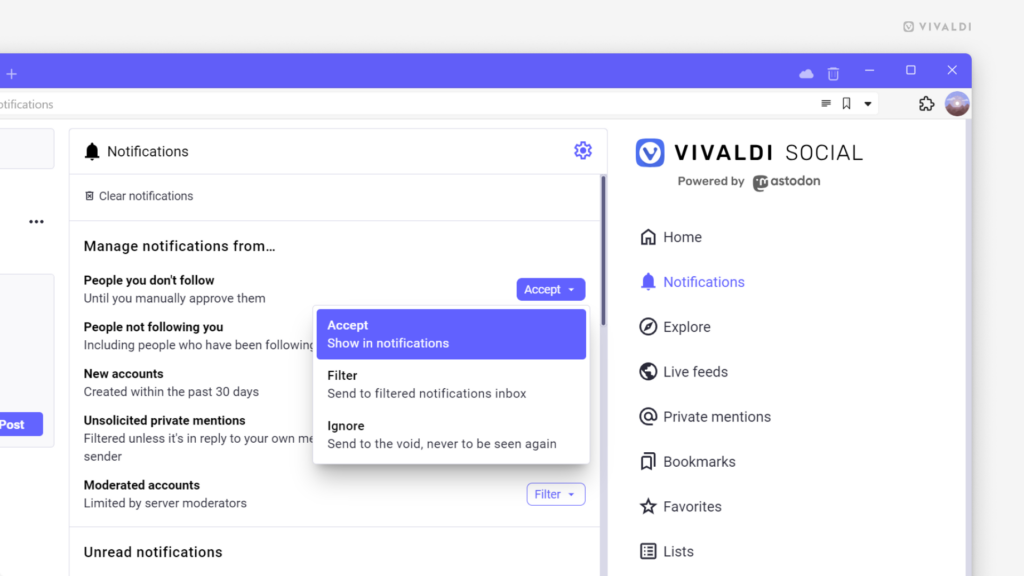
  2. In the “Manage notifications from” section, choose whether you want to accept, filter, or ignore notifications from the following groups:
    • People you don’t follow
    • People not following you
    • New accounts
    • Unsolicited private mentions
    • Moderated accounts
Notification settings in Vivaldi Social.

Tip #566

Hide posts from all users on a specific Mastodon instance.

When you notice that users on a particular Mastodon instance are posting content you don’t want to see or engage with, instead of muting or blocking users one by one, you can mute the whole instance.

To mute an entire Mastodon instance:

  1. Open the profile of one of the users on the instance.
  2. Click on the Menu button
  3. Select “Block domain [domain name]”.
  4. Confirm your decision by clicking “Block entire domain”.

Please note that this option hides the posts from you and removes followers from the instance, but users on the blocked instance, will still be able to see your posts.

Tip #561

Add hashtags to your Vivaldi Social posts to reach wider audiences.

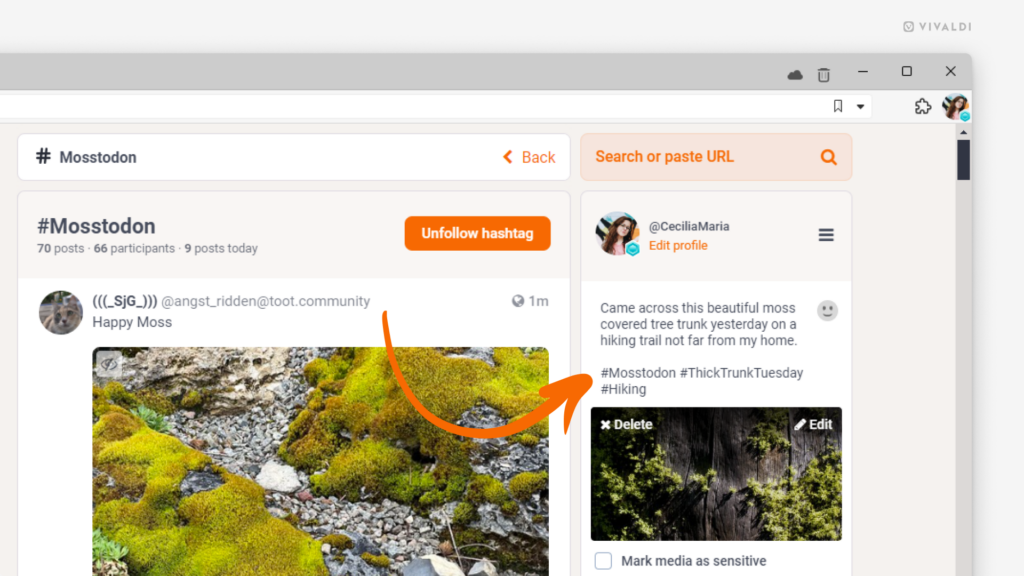
In Tip #485 we suggested following hashtags to fill your timeline with content on topics that interest you. To make your own posts equally discoverable, make sure to include relevant hashtags within the post’s text or add them on a separate line at the end of the post.

To add a hashtag, type the # symbol followed by the word (without a space between), for example, . You can also use multiple words in a hashtag. In that case, write all the words together without spaces and make sure each word starts with a capital letter, for example, . Capitalizing makes multi-word hashtags easier to read.

A post including 3 hashtags being drafted on Vivaldi Social.

Tip #551

Share interesting posts from Vivaldi Social with people on other apps.

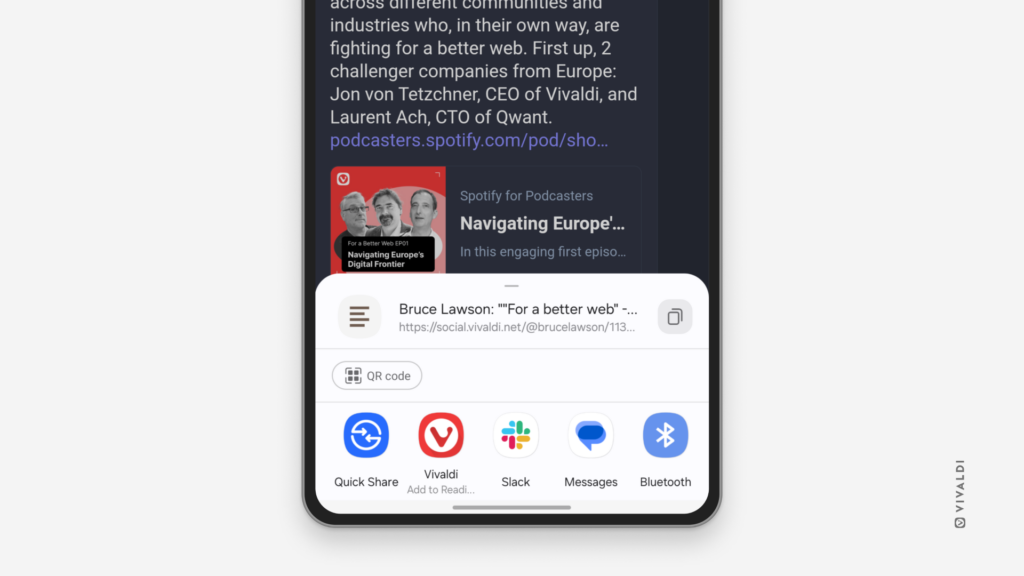
When you have the post with its comments open as a page in Vivaldi Social then it’s easy to copy the link from the Address Bar and share it. But when you’re casually browsing through your feeds, then opting for Vivaldi Social’s share option, which triggers the operating system’s share menu allows you to share content without losing your spot on the page.

To share posts from Vivaldi Social:

  1. Click on the 3 dot menu below the post.
  2. Select Share from the menu.
  3. Choose the app you want to share the post on.
  4. Follow the app’s directions.
Share menu that is displayed in Vivaldi on Android when sharing a post from Vivaldi Social.

Tip #536

Make your posts on Vivaldi Social self destruct after a while.

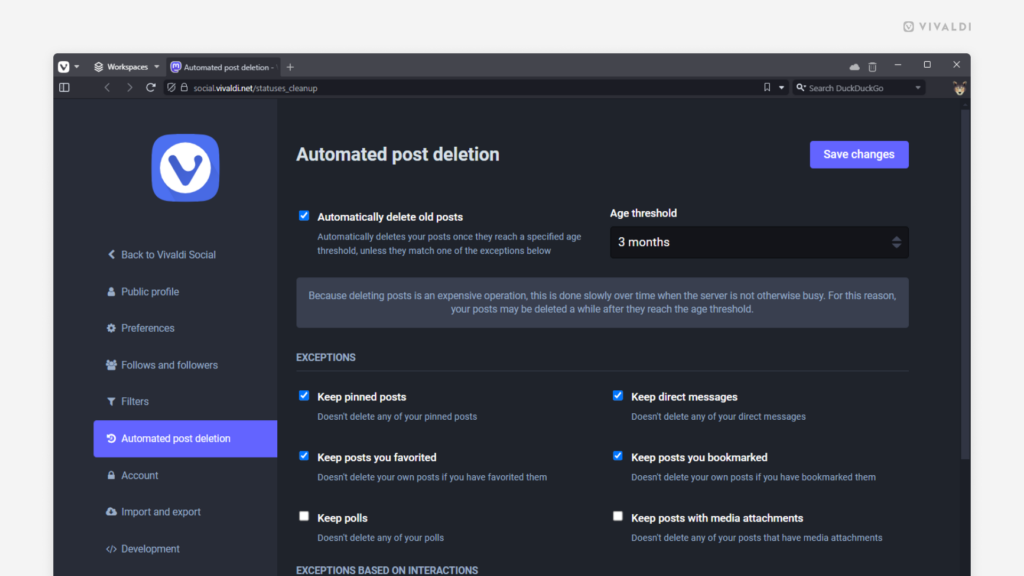
It can be nice to look back on posts you made months and years ago, but if you prefer to live in the moment, you can automatically delete your posts when they reach a certain age. There are plenty of exceptions you can make to ensure the important content such as pinned posts and private messages remains.

To automatically delete old posts on Vivaldi Social:

  1. Go to Preferences > Automated post deletion.
  2. Enable “Automatically delete old posts”.
  3. Select the age threshold.
  4. Review exceptions.
  5. Save the changes.
Vivaldi Social's preferences  open on the automatic post deletion page.

Tip #528

Add flair to your posts on Vivaldi Social with Vivaldi’s very own emojis.

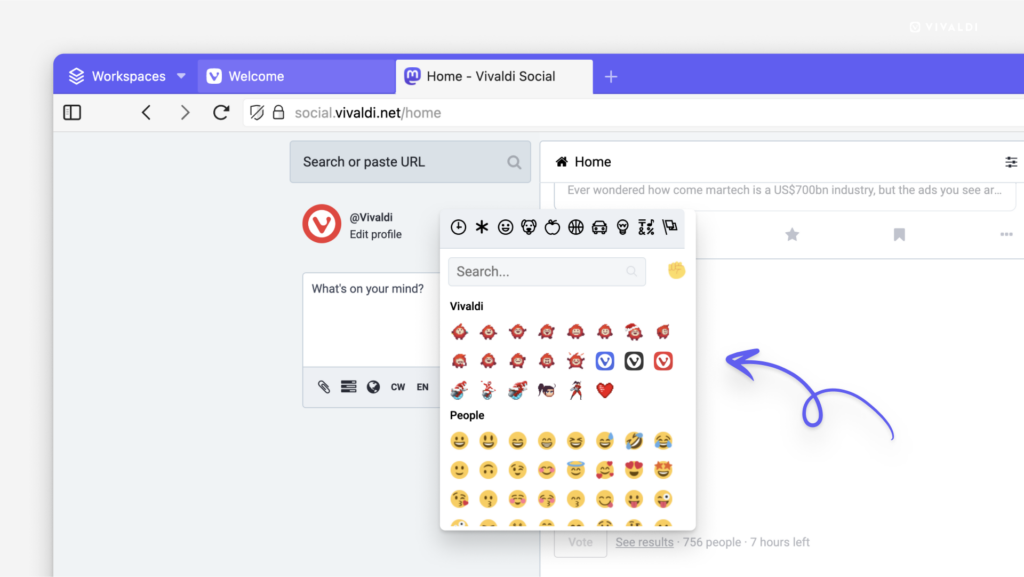
In addition to the basic emoji set, Mastodon, instances can add custom emojis. We’ve added some Vivaldi-related emojis to Vivaldi Social, including Vivaldi logos, our loveable lava ball Tony, and Vivaldia. You can also find these emojis on the Vivaldi Forum.

To use Vivaldi emojis:

  1. Click on the 🙂 “Insert emoji” button in the top right corner of the post editor on Vivaldi Social.
  2. Scroll past your frequently used and other custom emojis to the Vivaldi section.
  3. Click on the emoji you want to add to your post.
Emoji picker menu on Vivaldi Social. Arrow points at Vivaldi's custom emojis.

Tip #506

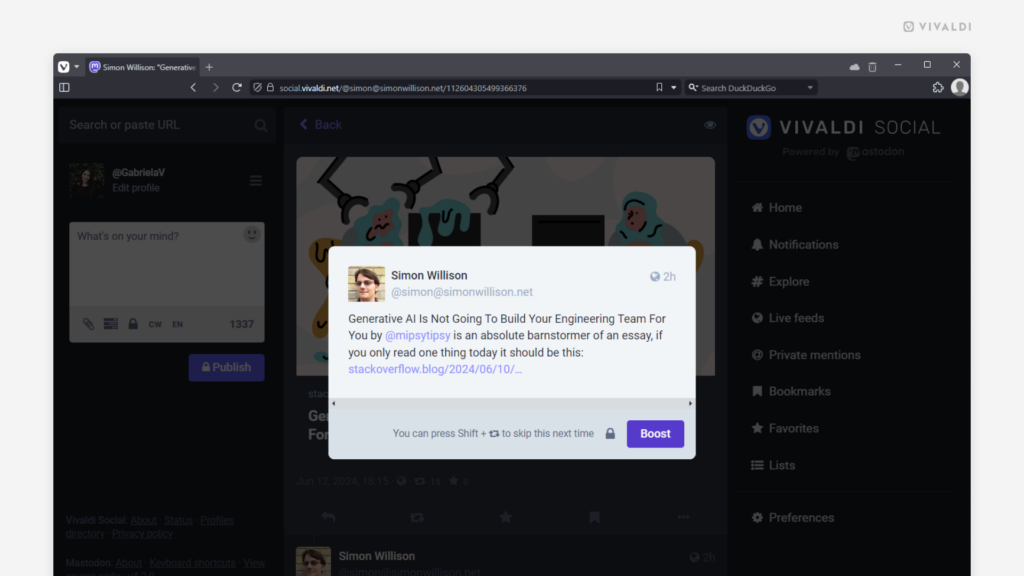
Enable confirmation dialogs on Vivaldi Social to prevent unwanted actions.

Even if you can undo some things, it’s better to prevent them in the first place. That’s why on Vivaldi Social, you can choose to be asked to confirm your decision before boosting or deleting posts, and before unfollowing an account.

To enable confirmation dialogs:

  1. Go to Preferences > Appearance > Confirmation Dialogs.
  2. Tick the boxes to enable showing the confirmation dialog before:
    • unfollowing someone,
    • boosting a post,
    • deleting a post.
Confirmation dialog on Vivaldi Social shown before boosting a post.

Tip #485

Follow hashtags on Vivaldi Social to see posts on the topic on your Home feed.

Since on Mastodon, there aren’t any algorithms deciding what content to show you, you need to actively follow accounts and hashtags to fill up your Vivaldi Social Home feed with interesting posts.

To find which hashtags to follow:

  • See which hashtags others have added to their posts.
  • Search for hashtags.
  • Browse trending hashtags on the Explore page.

To follow a hashtag:

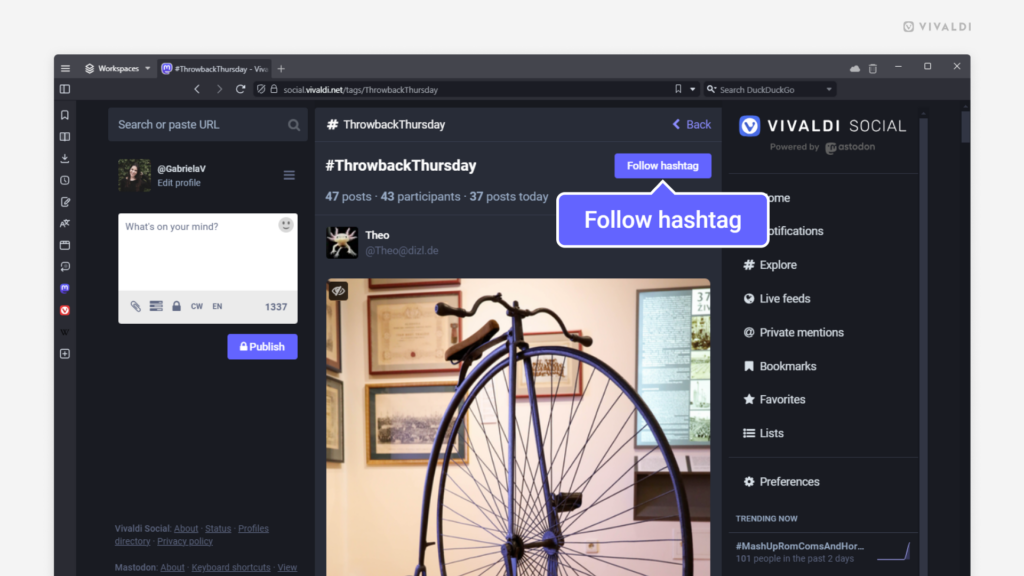
  1. Click on the hashtag to view recent posts using the hashtag.
  2. Near the top right corner, click on “Follow hashtag”.
A hashtag page open in Vivaldi Social. "Follow hashtag" button is highlighted.

Tip #474

Fine-tune your notification settings on Vivaldi Social per activity and notification type.

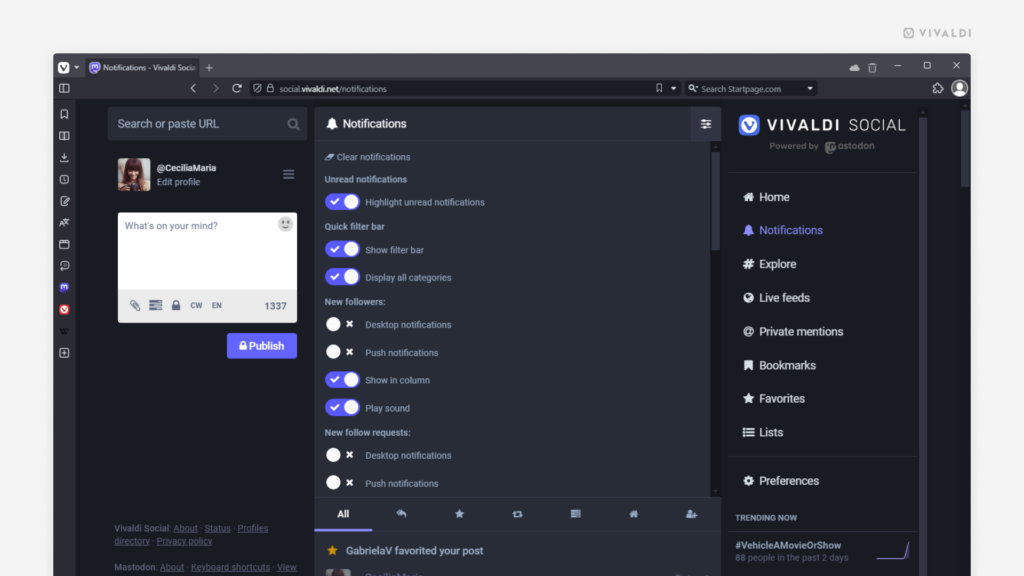
You can receive a notification about many things happening on Vivaldi Social. For example, when someone boosts your post, mentions you in their post, requests to follow you, etc. You probably care about some notifications more than others, so make use of the settings to decide what kind of notifications you get and how.

To edit notification settings:

  1. Go to your Notifications page.
  2. Click “Show settings” in the top right corner of the Notifications column.
  3. Toggle notifications on and off as you wish.

To learn about email notifications, check out Tip #374.

Notification settings open in Vivaldi Social.

Tip #468

Bookmark interesting posts on Vivaldi Social.

When you’ve come across a great post and want all your followers to see it too, you can boost the post. When you just want to let the author know that you liked their post, you can favorite it. Both boosted and favorited content can later be found among your posts and favorites.

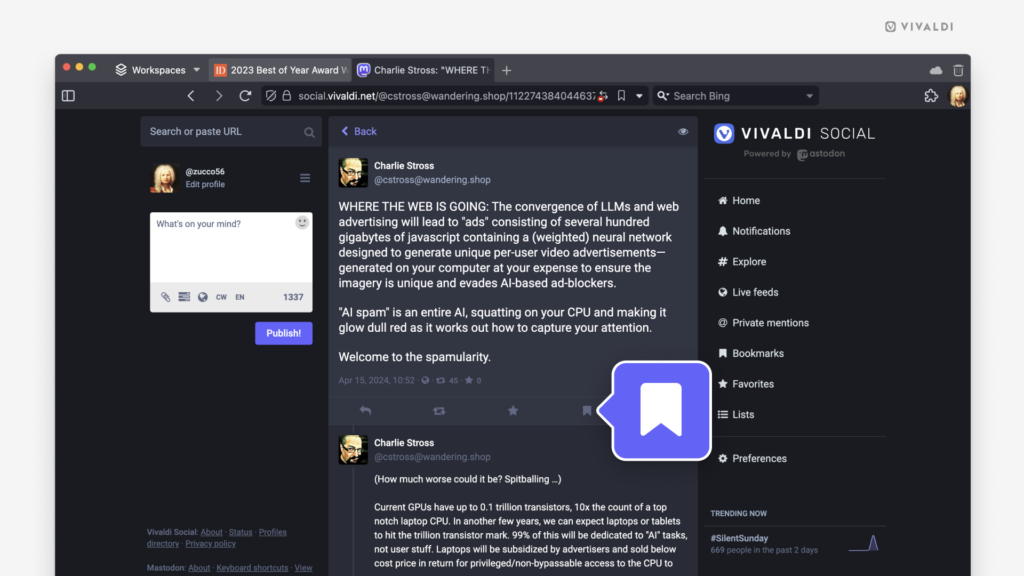
But what if you don’t want to publicly interact with the post or want make an extra record of a boosted/favorited post? In that case you have the option to bookmark it. To bookmark a post on Vivaldi Social, simply click on the “Bookmark” button below the interesting post.

A post open on Vivaldi Social with the bookmark button highlighted.

Tip #455

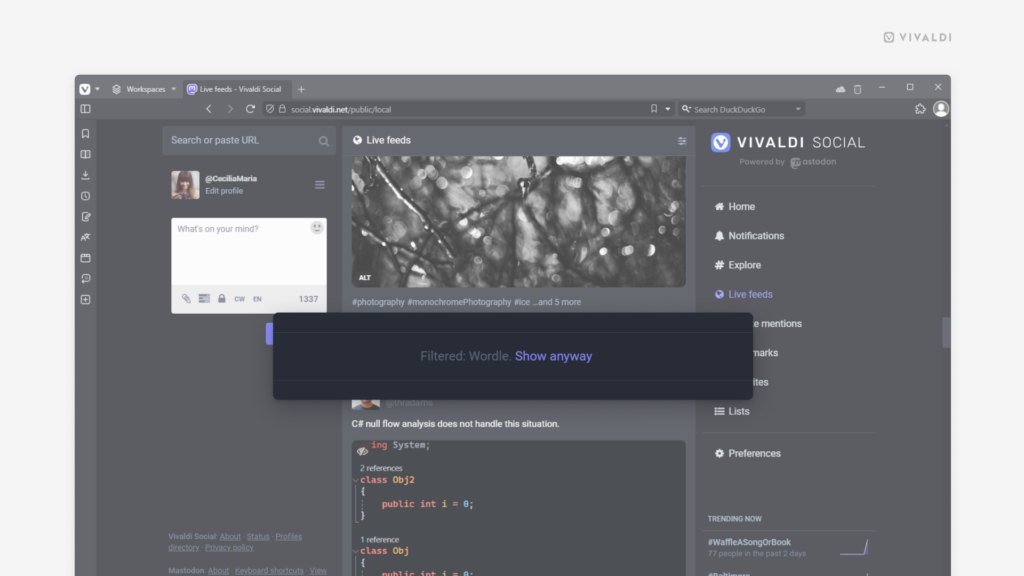
Filter out posts on Vivaldi Social that contain mentions of things you don’t want to see.

On Vivaldi Social, you can automatically hide posts that you find offensive, deal with sensitive matters, just oversaturate your timelines or you don’t wish to see for any other reason. You have the option to hide them behind a warning, still leaving you the option to click and view the post, or you can hide the posts outright.

To create a filter:

  1. Go to Preferences > Filters.
  2. Click on “Add new filter”.
  3. Give the filter a name (if you choose to hide the posts with a warning, the filter’s name will be mentioned on the post).
  4. If you want to apply the filter temporarily, select an expiration time.
  5. Choose where the filter will be applied – Home and lists, Notifications, Public timelines, Conversations, Profiles.
  6. Decide whether to hide the post behind a warning or remove it altogether.
  7. Enter the keyword(s) you want to filter out. You can enter words, phrases, hashtags or emojis.
  8. Click “Save new filter”.
Vivaldi Social open in a Vivaldi browser window. Filtered post warning is hihlighted.

Tip #440

Resize the editor on Vivaldi Social to view what you plan to post all at once.

Some time ago we increased the character limit for posts on Vivaldi Social from the standard 500 to 1337 characters. Reviewing your longer writing can be tricky in a small editor box, though. That’s why on Vivaldi Social, you can increase the height of the editor, to make more of the text visible.

To change the height of the editor:

  1. Place the mouse cursor at the bottom right corner of the text field (just above the character limit).
  2. Click and drag the mouse up or down.