Tip #314

View multiple timelines at the same time on Vivaldi Social.

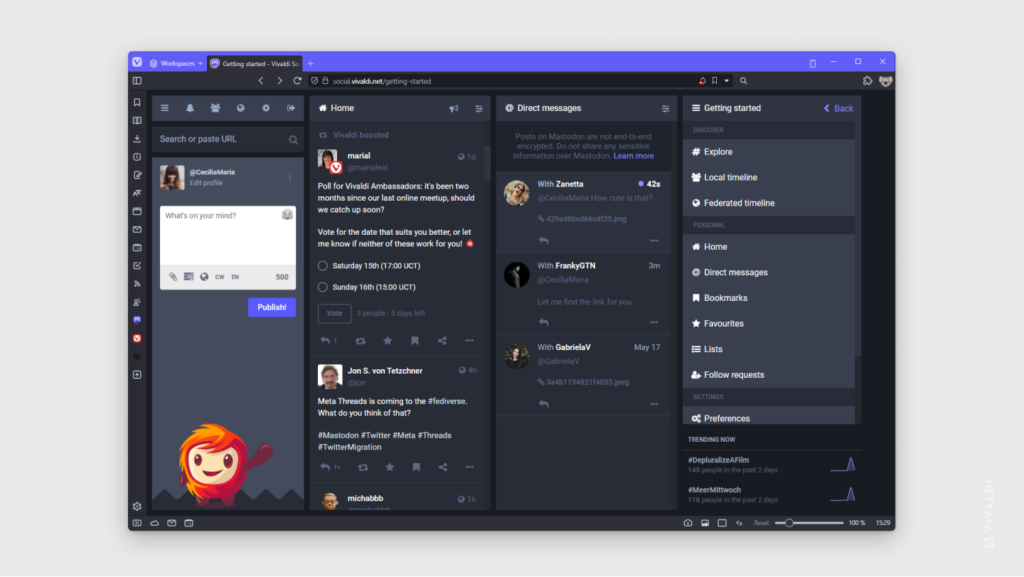
When browsing Vivaldi Social as a web page on a larger screen, you’ll notice that there’s just one column of content and quite a lot of free space on the page. If you want, you can opt for a multi-column view instead. With the multi-column aka advanced view, you can have different timelines, hashtags, direct messages, and moredisplayed in individual columns side by side.

To enable the multi-column view:

  1. Go to Preferences > Advanced Web Interface.
  2. Tick the box for “Enable advanced web interface”.
  3. Click “Save changes”.
  4. Exit preferences.
  5. Click on the “Show settings” button on the column headers to pin or unpin them.
Vivaldi Social with advanced web interface enabled.

Tip #313

Neatly packed together or a bit more spread out? Choose your way of displaying Tab Stacks.

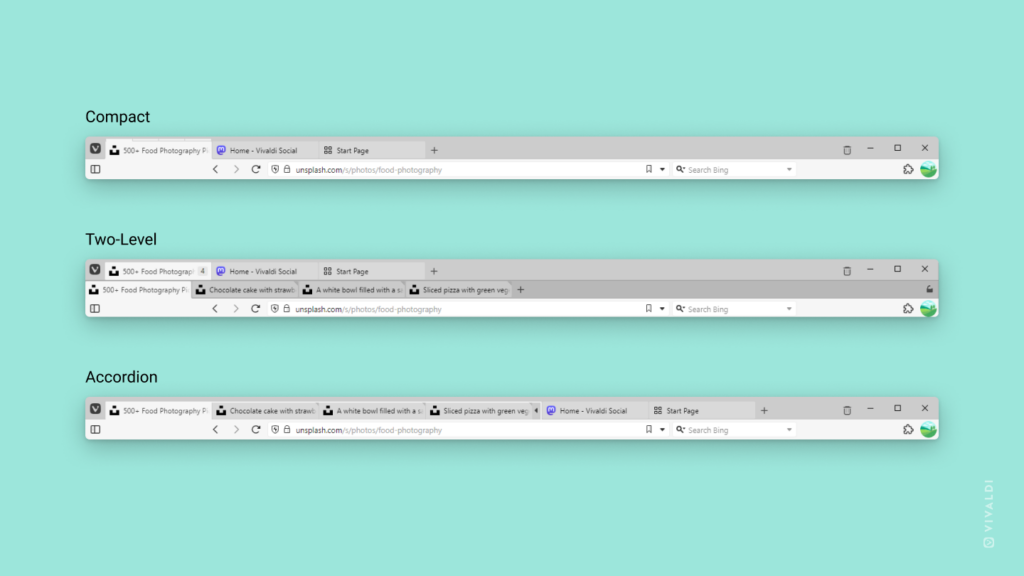
Tab Stacks in Vivaldi Browser are a great way to group related tabs together, but what is the best way to display your tab groups? That’s up to you to decide! We are providing you with 3 different options.

To change how your Tab Stacks are displayed on the Tab Bar:

  1. Go to Settings > Tabs > Tab Features > Tab Stacking.
  2. Choose between the following stacking options:
    • Compact,
    • Two-Level, and
    • Accordion, or
    • disable Stacks altogether.
Three Tab and Address Bars, each displaying a different way to showcase Tab Stacks.

Tip #312

Check for new messages in Vivaldi Mail at an interval that suits you.

Want to know immediately when someone has sent you a message or prefer to check for new mail on your own time? Vivaldi Mail offers you three options to choose from.

To review your mail checking frequency:

  1. Go to Settings > Mail > Mail Settings > Check For New Mail.
  2. Select whether new messages should be fetched:
    • every minute
    • every 15 minutes, or
    • manually.

Tip #311

Format your Vivaldi blog’s content beautifully and easily with Patterns.

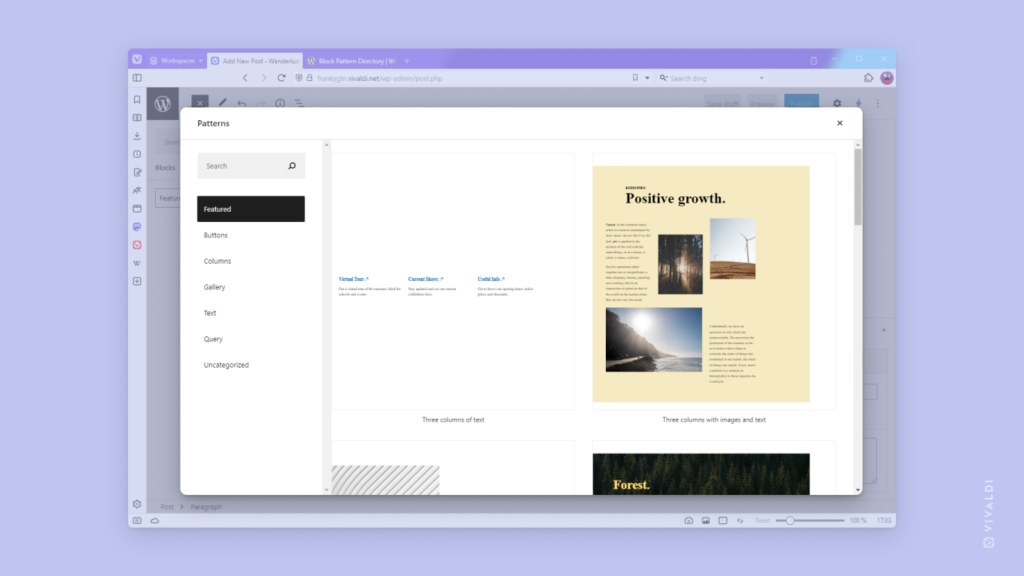
Block Patterns are premade layouts that you can add to your Vivaldi blog‘s posts and pages. They make showing off your content super easy, as you won’t need to spend time fiddling with different blocks and their settings.

To add a pattern to your blog:

  1. Open the post or page editor.
  2. Click on “Toggle block inserter” and go to the Patterns tab. (Click on “Explore” for a bigger view.)
  3. Browse through available patterns and click on the one you want to add to your post/page.
  4. Replace the example content with your own text and images.

For an even bigger selection of Patterns, visit https://wordpress.org/patterns/.

Pattern library open in Vivaldi Community Blog's editor.

Tip #310

Open links in new (background) tabs quickly with Mouse Gestures.

Mouse Gestures are an excellent way to execute commands in the browser with little mouse movements. For example, when researching something on a web page that references many other pages, you can open these links easily in new background tabs without losing your spot on the page you’re currently on.

To open a link in a new tab using a Mouse Gesture:

  1. Hover the mouse cursor over the link you want to open.
  2. Hold down the right mouse button.
  3. Drag the mouse down and up again to open it in a new background tab or drag the mouse just down to open the link in a new foreground tab.
  4. Release the mouse button.

Explore more gestures in Settings > Mouse > Gesture Mapping.

Tip #309

Install Vivaldi Social as a Progressive Web App to use it in an independent window.

Vivaldi Social (and other Mastodon instances) can be accessed in Vivaldi through a web page in a Tab or Web Panel and you can connect to the Fediverse from Mastodon’s desktop and mobile apps. If you’d like to have something between the two, you can install Vivaldi Social as a Progressive Web App, which allows you to use Vivaldi Social with the Vivaldi Browser, but in its own dedicated window.

To install Vivaldi Social as a PWA on desktop:

  1. Open social.vivaldi.net in a tab.
  2. Right-click on the tab to open the context menu.
  3. Select “Install Vivaldi Social”.
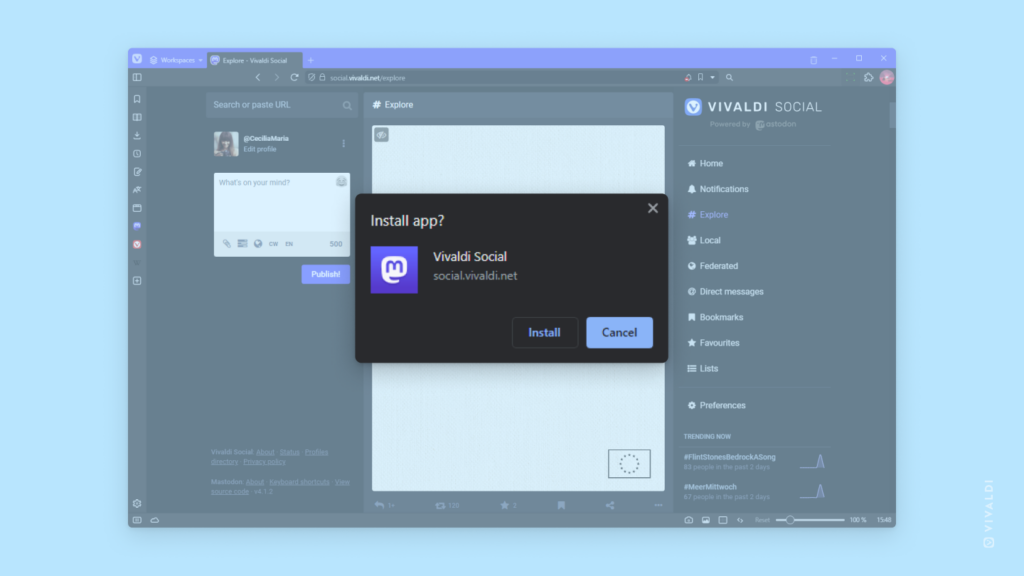
  4. Click Install to add an icon to your desktop.

You can also create a shortcut for Vivaldi Social in Vivaldi on Android:

  1. Open social.vivaldi.net in a tab.
  2. Open the browser’s main menu.
  3. Select “Install App”.
  4. Tap on “Install”.
  5. Tap on “Add” or drag the icon to the Home screen.
Dialog in Vivaldi Browser asking to confirm the installation of Vivaldi Social as a Progressive Web App.

Tip #308

Create a copy of a theme and edit that, instead of changing the original.

Themes in the Vivaldi Browser allow you to make the browser more personal. Though there are many default themes to choose from and a huge selection on themes.vivaldi.net, the one you like might be missing that final touch that makes it perfect for you. But instead of updating the original theme, create a copy of it and update the copy. That way you can go back to the original theme or use it again to create another theme.

To copy and edit a theme:

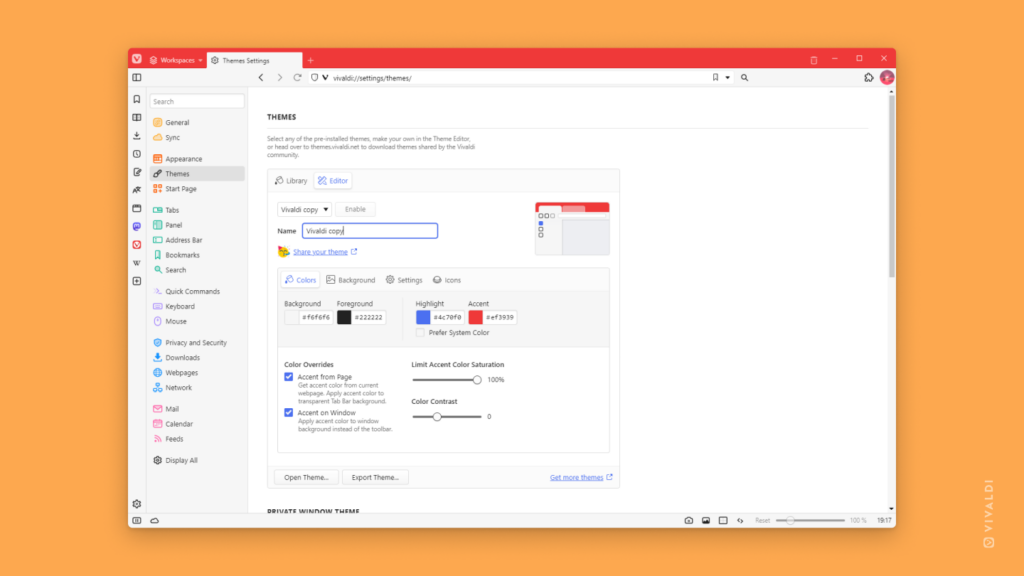
  1. Go to Settings > Themes.
  2. Select the theme you want to use as the base.
  3. Click on “New Theme”.
  4. Make changes to the copy.
Theme Settings open in Vivaldi. Copied theme is being renamed.

Tip #307

Update Speed Dial thumbnails with one click.

If the Speed Dial thumbnail is missing or you don’t like the current one, you can update it with a new screenshot of the web page. If you prefer to choose an image for the thumbnail, follow our directions in Tip #69.

To quickly update Speed Dial thumbnails:

  1. Hover over one of the Speed Dials.
  2. Click on “Update thumbnail” in the top left corner of the Speed Dial.
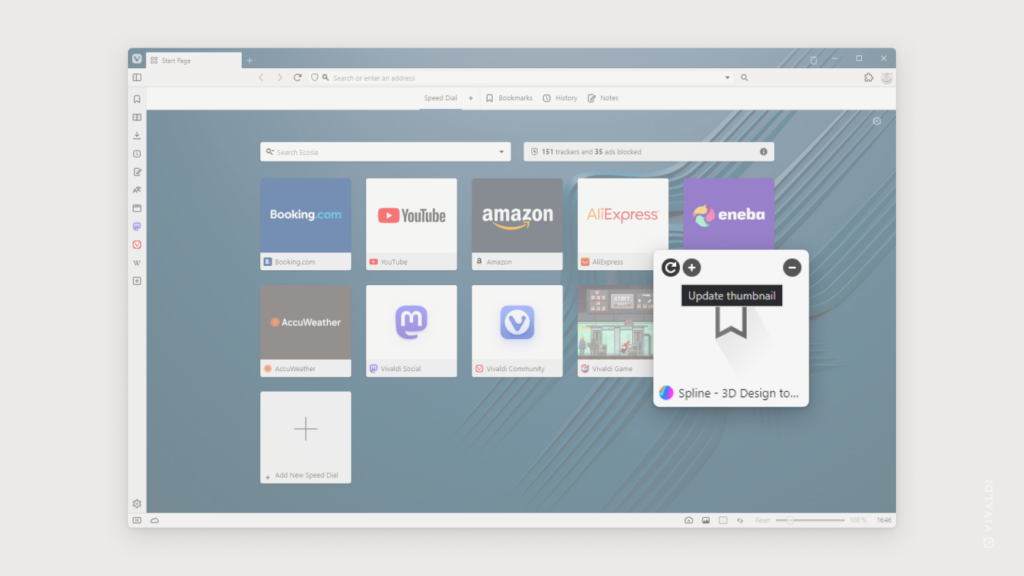
Vivaldi Browser's Start Page with a Speed Dial that has no thumbnail being updated.

Tip #306

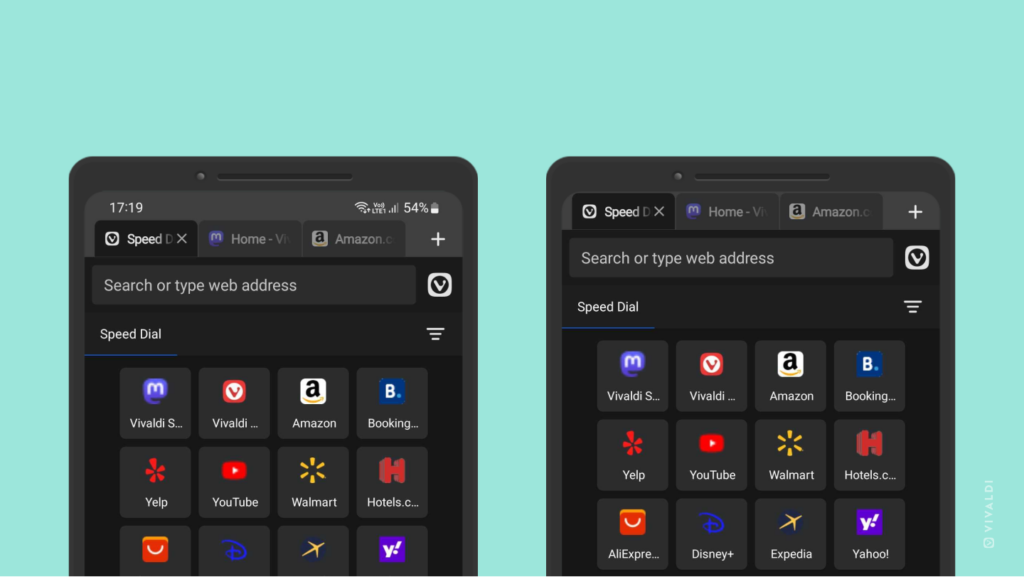
Hide the Status Bar to give more space for page content in Vivaldi on Android.

You can gain a few pixels for displaying more web content and/or hide distracting notification icons from view, by hiding Android’s Status Bar. It’s especially useful when you tend to browse more with Vivaldi in landscape mode.

To hide your mobile devices Status Bar while using the app:

  1. Go to Settings > Appearance > Status Bar Visibility.
  2. Select, whether to show or hide the Status Bar, or to show it in portrait mode, but hide it in landscape mode.
Two mobile phones with Vivaldi on Android open. One has the Status Bar visible, the other has it hidden.

Tip #305

Turn the Search Field on the Address Bar into a Search Button.

If you feel like the Search Field takes a little too much space on your Vivaldi Browser’s Address Bar, you can have it displayed as a button instead. The button is also a great option if you want to move the Search function to the vertical Panel bar.

To display Search as a button:

  1. Go to Settings > Search > Search Field Display.
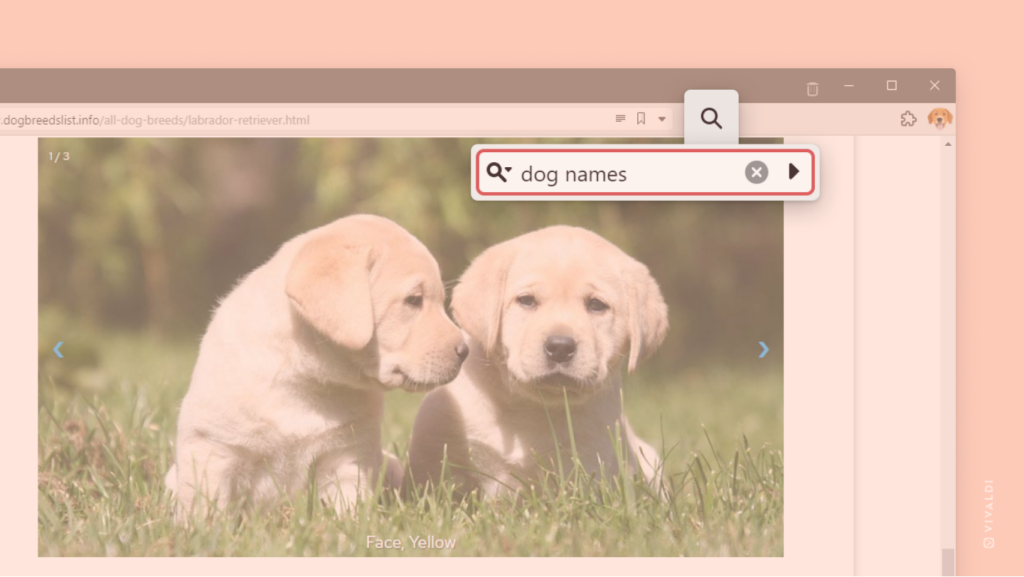
  2. Select “Show as a Button”.

To search for something on the web, click on the button to show the full Search Field.

Vivaldi Browser with Search field replaced with a Search Button. The button has been clicked to show the search field.

Tip #304

Group people you follow on Vivaldi Social into Lists to create filtered timelines.

If you follow many different types of accounts on Vivaldi Social, the main Home timeline can feel like a huge smorgasbord of content. To focus on one topic or group of people at a time, divide the accounts you follow into Lists.

To create a list:

  1. Go to the Lists page.
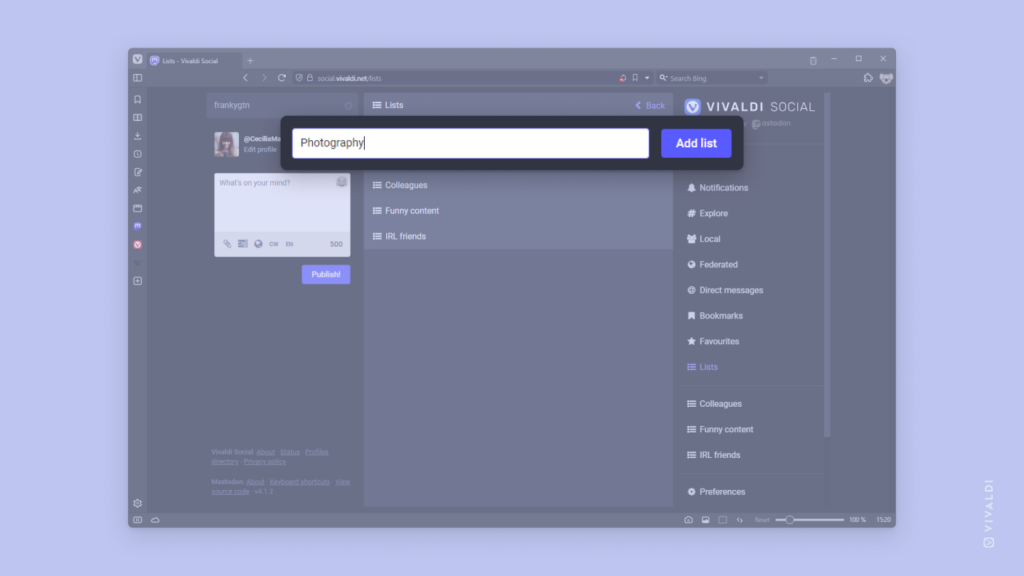
  2. In the text box that says “New list title” give your new list a name.
  3. Click “Add list”.

To add people to Lists:

  1. Open the list.
  2. Click on “Show settings” > “Edit list”
  3. Enter the usernames of the people you want to add to the list.
  4. Click on “Add to list” next to their name.

Alternatively:

  1. Visit the user’s profile.
  2. From the account menu, select “Add or Remove from lists”.
  3. Select which lists you want to add the user to.

Lists’ timelines can be accessed from the menu column on the right side of the page.

Lists page on Vivaldi Social, with a new list about Photography being created.

Tip #303

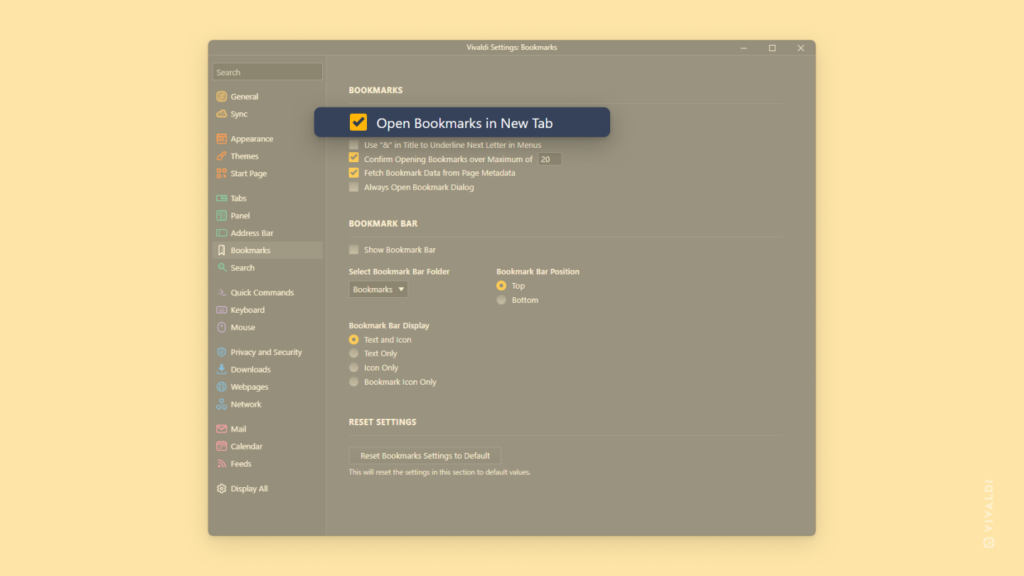
Open all Bookmarks in a new tab.

By default, Bookmarks open in the active tab. If you’d rather not have Bookmarks hijack websites you were viewing, you can opt for opening them in their own tab as well.

To always open Bookmarks in a new tab:

  1. Go to Settings > Bookmarks.
  2. Enable “Open Bookmarks in New Tab”.

To open a single bookmark differently from your default setting, right-click on the bookmark and select the opening option you prefer – “Open in New Tab”, “Open in Background Tab”, “Open” (in active tab), plus “Open in New Window”, “Open in New Private Window”.

Vivaldi Settings open on the Bookmarks section. "Open Bookmarks in New Tab" option is highlighted.

Tip #302

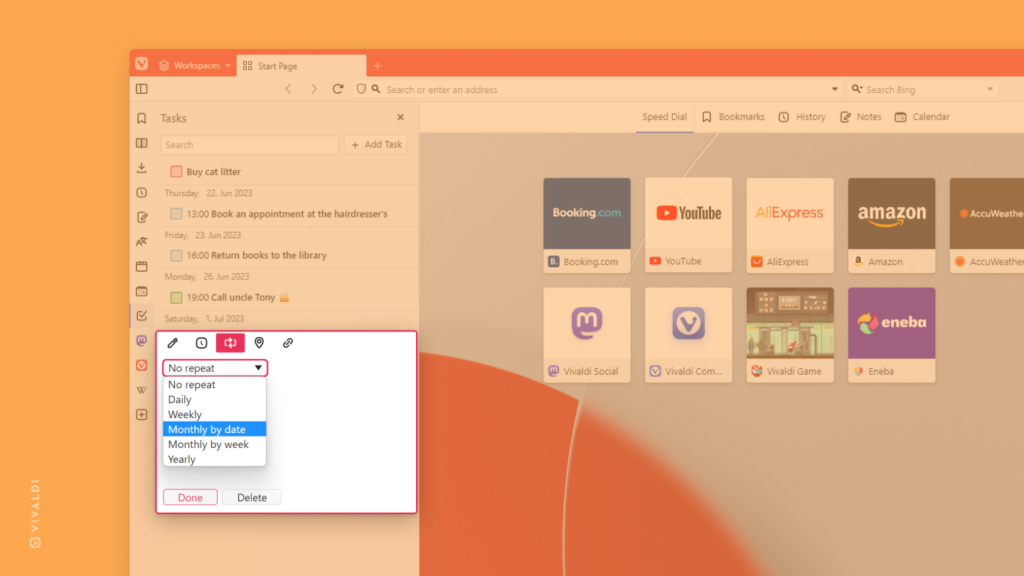
Create recurring tasks in Vivaldi Calendar to stay on top of your responsibilities.

Tasks in the Vivaldi Calendar and in their own Tasks Panel are a great way to keep track of your to-do list. To make life even easier, you can create recurring tasks for things you need to do regularly.

To create a recurring task:

  1. Start creating a new task in the Tasks Panel, Calendar Panel, or in the Calendar tab.
  2. Enter details, like the title and due time of the task.
  3. Switch to the Recurrence view.
  4. From the drop-down menu, select whether you want the task to repeat daily, weekly, monthly by date, monthly by week, or yearly.
  5. Depending on your choice, review the additional options for each repetition option.
  6. When you’re ready, click “Done”.
Task editor open on the recurrence settings section in Vivaldi's Tasks Panel.

Tip #301

Share multiple links in one go by copying all links.

Copying links one by one to share or save them is a thing of the past in Vivaldi. Instead, you can copy all links you have open in a Workspace and Tab Stack with just a couple of clicks. In addition, you can manually select specific tabs and copy the links of those.

To copy multiple links at once:

  1. Right-click on a Workspace in the Workspaces menu, on a Tab Stack, or on one of the tabs you selected on the Tab Bar.
  2. Select “Copy all links” from the context menu.
  3. Paste the list of links in a message you’re sending to someone or in a note/document where you want to save them.

Now, sharing your research on the trip you’re planning with your family, sending a bunch of memes to a friend, who needs cheering up, or something else is smoother and faster than ever before.

"Copy All Links" context menu item highlighted on the Workspaces menu.