Tip #89

Customize Speed Dials from Quick Settings.

You can always customize your Start Page and Speed Dials from the main Settings page. To see the changes, though, you have to go back and forth between Settings and the Start Page. An alternative is to make the changes in the Quick Settings panel on the Start Page itself. That way you can see the changes immediately.

To customize the Speed Dial via Quick Settings:

  1. Open the Start Page.
  2. Open Quick Settings from the top right corner of the page.
  3. Go to the Speed Dial Appearance section.
  4. There you can:
    • Adjust the thumbnail size.
    • Set the maximum number of speed dial columns that can be displayed.
    • Choose whether to display the titles of the speed dials.
    • Toggle off and on Add and Delete buttons.

Tip #88

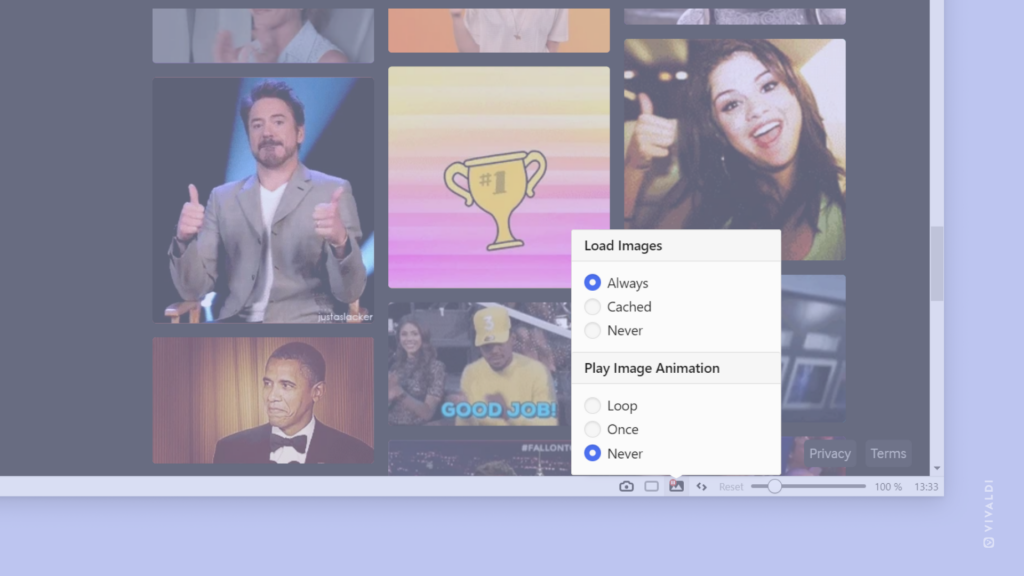
Prevent animated images from playing.

When you load a page, then by default all images are loaded and animated ones play on a loop. If constantly moving images are a disturbance for you, you can prevent it with a simple setting change.

To stop images from moving:

  1. Click on Toggle images and animation on the Status Bar.
  2. For Play Image Animation select either Once, if it’s ok to go through the animation one time, or Never, if you don’t want them to move at all.
  3. Reload the page.
Toggle images and animations menu open over a web page with gifs.

Tip #86

Filter search results in Quick Commands to find exactly what you’re looking for.

To search only a specific category in Quick Commands, you can use a the following keywords in front of the search term to filter out only relevant results:

  • Bookmarks – bookmark:
  • Notes – note:
  • Open and Closed Tabs – tab:
  • Browsing History – history:
  • Commands – command:
  • Page Actions – action:

An example:

  1. Press F2 / ⌘ E to open Quick Commands.
  2. Type “bookmark:” followed by your search term.
  3. If the needed search result isn’t highlighted already, use up and down keyboard keys to select the bookmark you were looking for.
  4. Press Enter or click on the bookmark to open it.

It’s also possible to use shorter keywords like bkm: (bookmark), tb: (tab), cmd: (command) and other alternative search terms derived using regular expression.

Tip #83

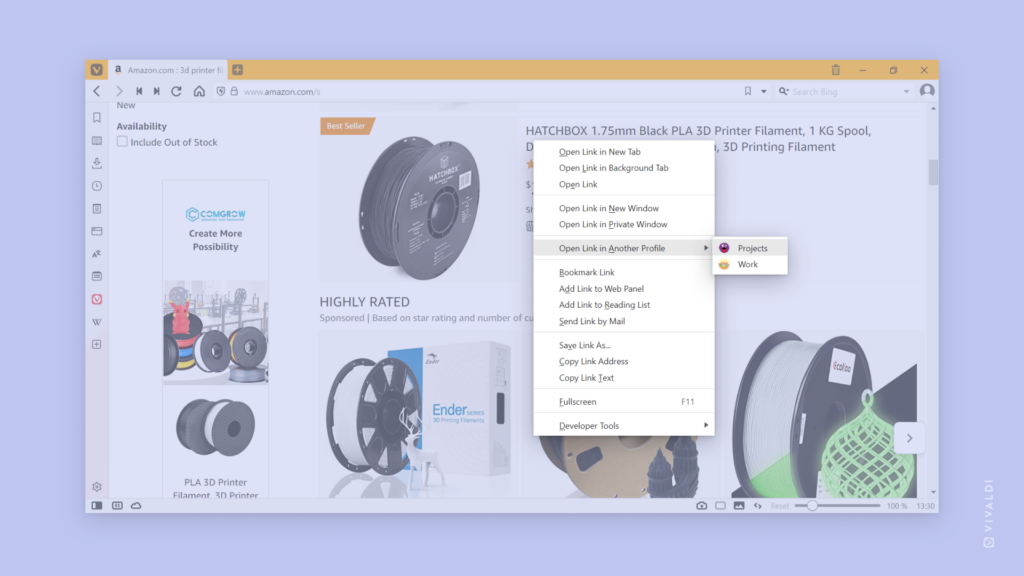
Keep related topics together by opening links in the relevant User Profile.

If you’ve compartmentalized your browsing by creating multiple User Profiles, you can open links from one profile in the other, should you come across a useful link in the “wrong” profile.

To open links in a different User Profile:

  1. Right-click on the link to open the context menu.
  2. Click on the second profile’s name.
    If you have more than two User Profiles, first select Open Link in Another Profile and then the profile you want to open the link in.

Focus will go to the profile window where the link will be opened.

To open active tab’s link in another profile, try the suggestion shared in Tip #63.

Tip #82

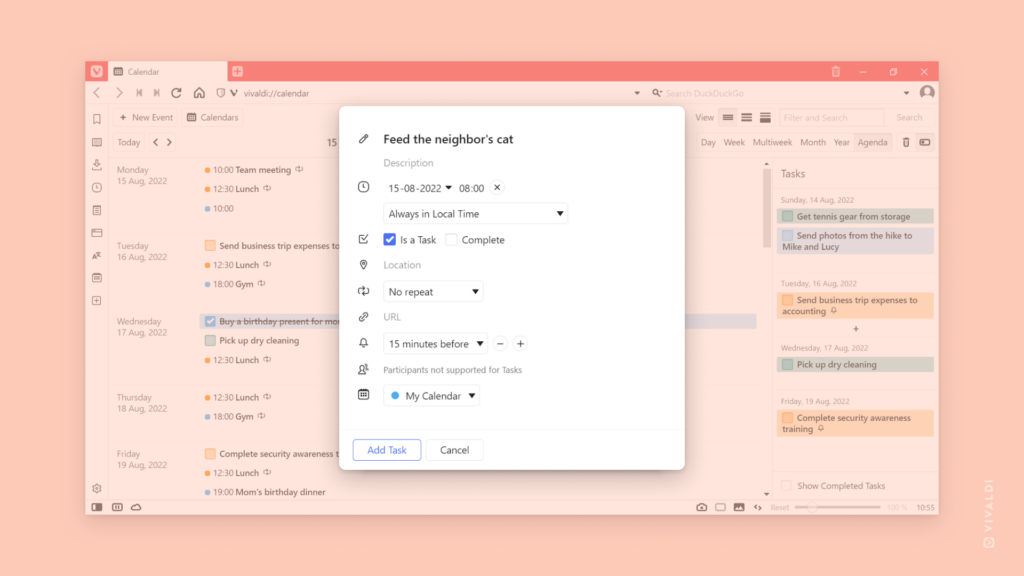
Stay organized by adding tasks to the Calendar.

Vivaldi Calendar can easily be used to keep track of your to-do list. Tasks with deadlines will be shown on their due date among your other events. All tasks, including ones with a deadline, can be seen in the Agenda view.

To create a new task in the Vivaldi Calendar:

  1. Start creating an event by clicking on any timeslot in the calendar or on New Event in the top left corner of the Calendar page.
  2. Enter the task’s details.
  3. Tick the box for Is a Task.
  4. If the task needs to be completed by a certain time, give the task a deadline.

Tip #81

Set your preferred commands for Rocker Gestures.

Rocker Gestures are Mouse Gestures used to execute commands with the left and right mouse buttons.

To perform an action using Rocker Gestures, you have two options:

  • Rock to the right – hold down the left mouse button, then click the right mouse button.
  • Rock to the left – hold down the right mouse button, then click the left mouse button.

To edit Rocker Gestures:

  1. Go to Settings > Mouse > Rocker Gestures.
  2. Select a command from the list of available actions. Once you’ve opened the list, you can also type the name of the command to find it faster.

Tip #79

Choose how long you want to keep your browsing history for.

Whether you like to keep a record of websites you’ve visited indefinitely or delete everything once you’re done browsing, you have options in Vivaldi.

To change for how long your browsing History is kept for:

  1. Go to Settings > Privacy and Security > Privacy > Save Browsing History.
  2. Select your preferred option:
    • Session only,
    • One Day,
    • One Week,
    • One Months,
    • Three Months (default),
    • Six Months,
    • One Year,
    • Forever.
  3. Restart the browser.

Tip #78

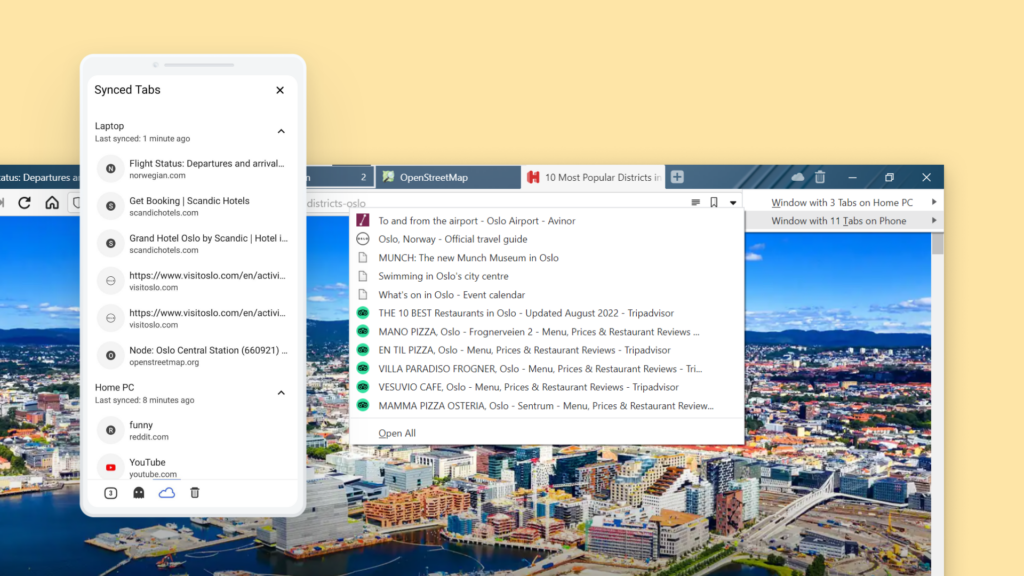
Synchronize your browser data to access open tabs on other devices.

If you browse with Vivaldi on multiple devices, then by using the Sync feature, you can continue browsing seamlessly when switching devices.

To be able to access tabs you have open on other devices:

  1. Go to the Vivaldi menu > Settings > Sync.
  2. Log in to your Vivaldi account.
  3. Enter the encryption password.
  4. Sync all or select the data types you want to sync, but make sure to enable syncing of History.

To open synced tabs on desktop:

  1. Click on the cloud icon on the right side of the Tab Bar (bottom, if you’re using a vertical Tab Bar).
  2. Select the synced device.
  3. In the list of synced tabs, click on the web page you want to open.

To open synced tabs on Android:

  1. Open the Tab Switcher.
  2. Tap on the cloud icon on the menu at the bottom of the screen.
  3. In the list of synced tabs, tap on the web page you want to open.

Learn more about Sync:

Tip #77

Display the main application menu horizontally on the top edge of the browser window.

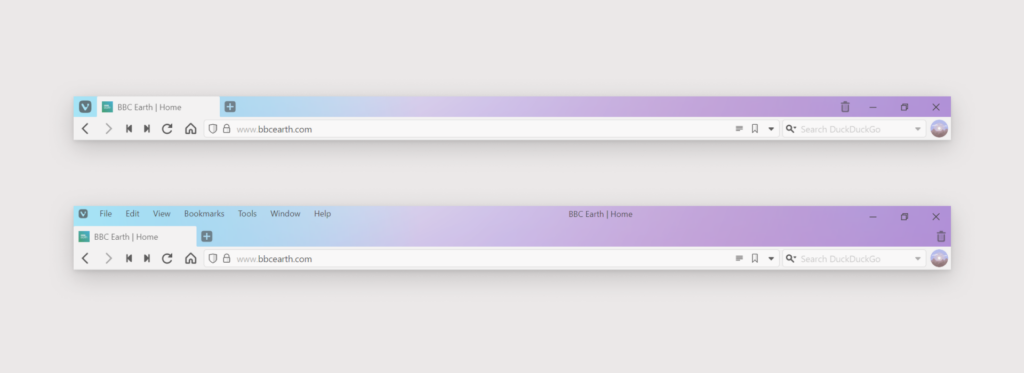
On macOS, Vivaldi’s main menu is always fully visible. On Windows and Linux, by default, the main menu can be accessed by clicking on the little Vivaldi logo in the top left corner of the window. But it can also be displayed in full on the top edge of the browser window.

To display the horizontal menu:

  1. Go to Settings > Appearance > Menu > Menu position.
  2. Select Horizontal.

Alternatively, toggle horizontal menu’s visibility from Vivaldi menu > View > Horizontal Main Menu.

Sections of the browser window displaying the main menu both as a button and horizontally.
Top: Vivaldi button menu. Bottom: Horizontal menu

Tip #76

Right-click on the Bookmark Bar to manage the bookmarks on it.

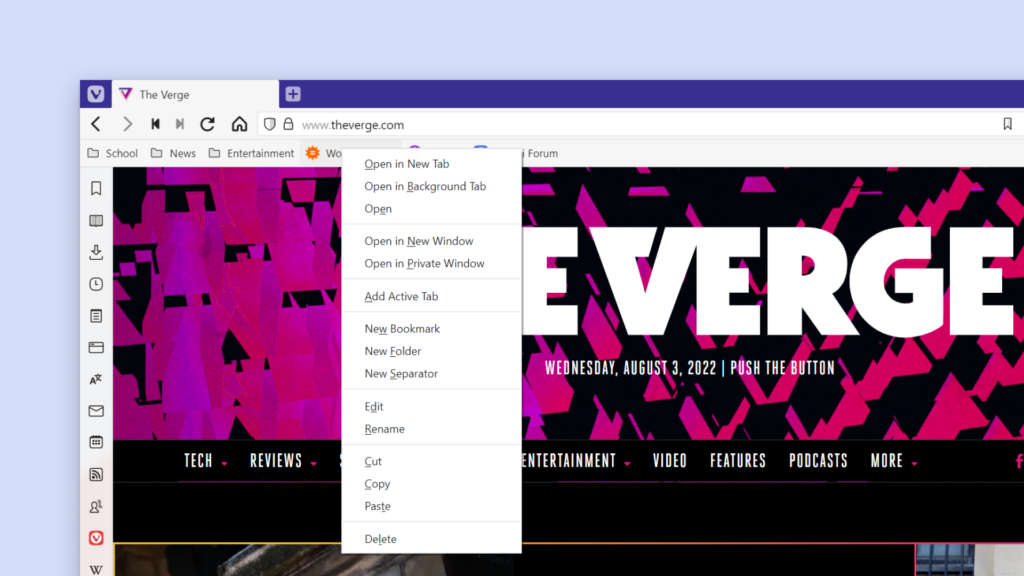
Clicking on a bookmark, bookmark folder or empty space on the Bookmark Bar with the right mouse button will open a menu with various useful options.

Depending on where you click, the menu options you see may include the following:

  • Where to open the bookmarked link. For example, in a new tab or a window.
  • Option to add the active tab as a new bookmark on the Bookmark Bar.
  • Manually create a new bookmark, bookmark folder or a separator for segmenting the Bookmark Bar.
  • Edit the bookmark or bookmark folder.
  • Cut (to move a bookmark), Copy (to make a copy of the bookmark or copy the link) and Paste (to move a bookmark or create a new bookmark from a copied link).
  • Delete the bookmark or bookmark folder.
  • Sort the bookmarks (only available, when clicking on an empty area of the Bookmark Bar).

Tip #74

Add a new custom Search Engine to Vivaldi from the site search field’s context menu.

Adding a new Search Engine to Vivaldi lets you get to the site’s search results without needing to navigate to the page first. To add a new custom Search Engine:

  1. Go to the website where you often use the site’s search feature.
  2. Right-click on the search field.
  3. Select Add as Search Engine from the context menu.
  4. Review and, if needed, edit the name and nickname.
  5. Click Add.

To search with your new Search Engine, type its nickname before the search term in the Address Field or select it from the Search Field’s dropdown menu.

Tip #73

Save time typing by inserting Notes to text fields.

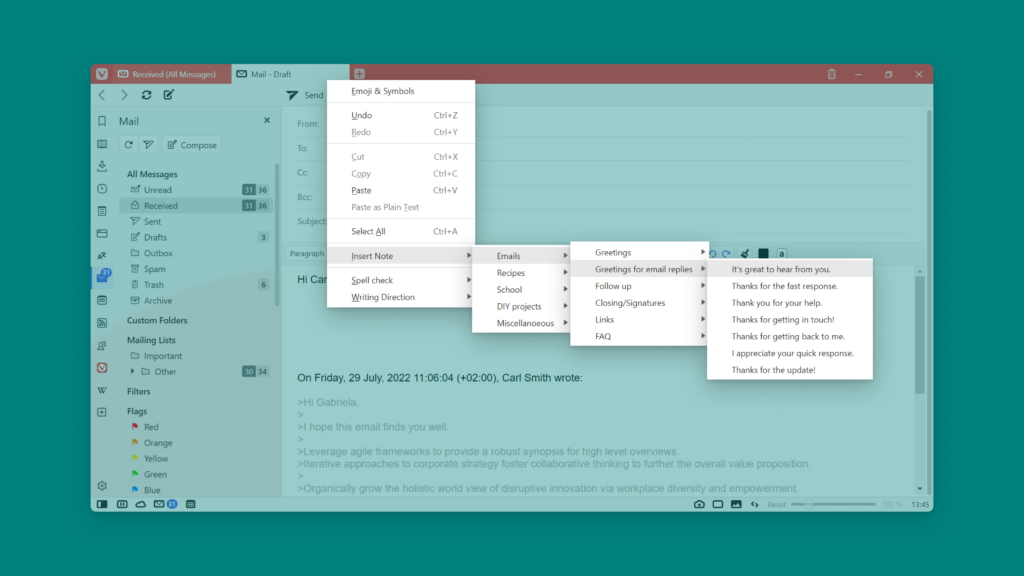
If there’s text you need to enter somewhere often enough, you might want to save that text as a note and just insert it from the context menu every time you need it. It saves time and prevents accidental typos. Win-win! 😎

To use this trick:

  1. Create the note(s) with the text in the Notes Panel or Notes Manager.
  2. When ready to use, right-click in the text input field to open the context menu.
  3. Select Insert Note and find the note you want to use.
  4. Click on it to insert the note’s text.

Bonus tip!

While the focus is on the text input field, use the Keyboard Shortcut Shift + F10 (on Windows & Linux) to open the context menu. Then use arrow keys or menu item anchor letters to find the correct note. Press Enter to insert the note.

Tip #72

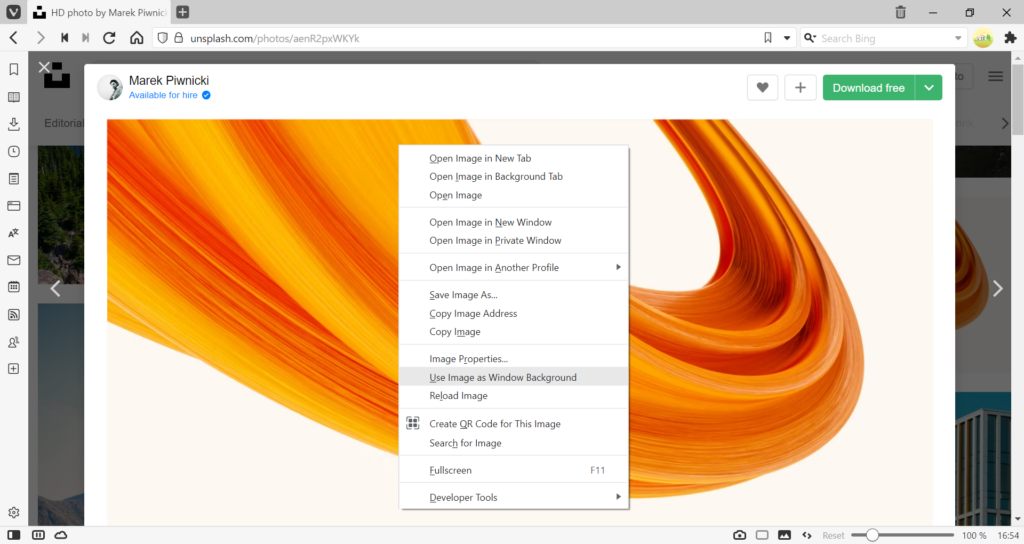
Add a new background image by right-clicking on an image and selecting Use Image as Window Background.

To update your browser’s Theme with a new background image, you don’t necessarily have to add a file from your computer, you can also set an image from the web as your background image.

  1. Find an image you like.
  2. Right-click on the image.
  3. Select Use Image as Window Background.
  4. Open Start Page to see how it looks.
A web page with a large image and context menu open on top.

Tip #71

Open Settings in a Tab instead of separate window.

By default, Vivaldi Settings open in a new window. If you would prefer Settings to open in a Tab like web pages and other internal pages:

  1. Go to Settings > Appearance > Window Appearance.
  2. Enable Open Settings in a Tab.

Then, the next time you open Settings, they’ll be in a tab instead of window.