Tip #135

Customize your Vivaldi blog’s editor to support your writing habits.

It’s not just the Vivaldi browser that’s highly customizable. You can also tweak many settings in the WordPress based blogging platform.

To customize your Vivaldi blog’s editor:

  1. Go to blogs.vivaldi.net and log in to your account.
  2. Click on Write a new post below your profile picture in the top right corner.
  3. In the post editor, click on Options in the top right corner to open the menu with some useful options.
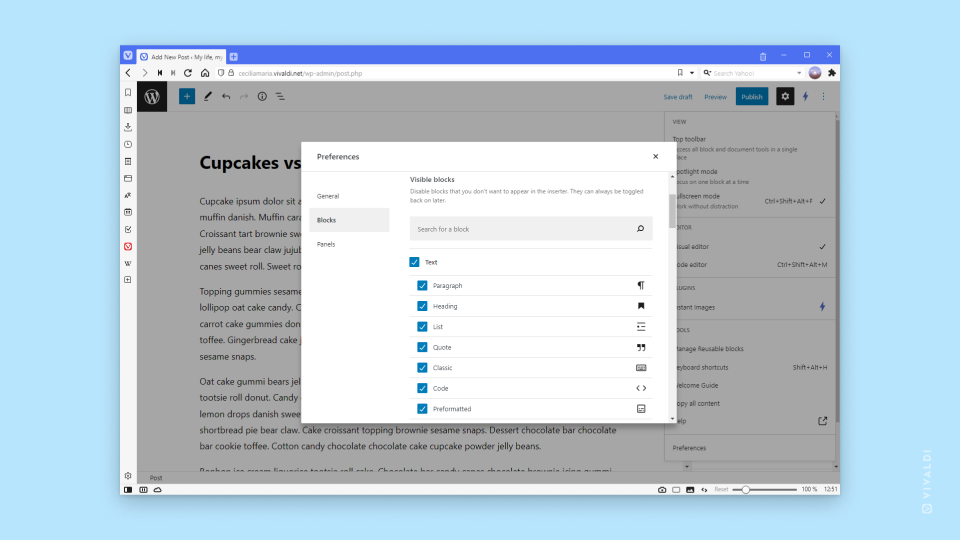
  4. To customize the editor’s look and available components, click on the last item on the menu – Preferences.

In Preferences you can change settings for:

  • Publishing,
  • Appearance,
  • Block Interactions,
  • Visible Blocks,
  • Document Settings,
  • and more.
Vivaldi blog post editor with Preferences window open on the Blocks section.

Tip #85

Get a hierarchical overview of your blog post by opening the List View.

When writing a blog post or creating a new page on your blog on Vivaldi.net, you can get a better overview of the blocks used in the blog and select blocks to work on from the List View.

To open List View, click on the List View button in the top left corner of the page.

To focus on a block and edit it, click on the block in the List View.

To close List View, click on the same List View button or on the Close button in the top right corner of the List View panel.

Tip #27

Add high quality and free images to your Vivaldi blog using Instant Images.

A common way to enhance blog posts is to add images to it. When you host your blog on Vivaldi.net, you can easily find and insert images to the blog using the Instant Images plugin. With the plugin you can add images from Unsplash, Pixabay and Pexels directly to your blog’s Media Library, without having to download the files to your computer first.

To add a photo to your blog:

  1. In the post or page editor, add a new image or gallery block.
  2. Select Media Library and go to Instant Images tab.
  3. Search through the files from Unsplash, Pixabay and Pexels.
  4. When you’ve found one you like, click on the image.
  5. After it has been added to your library, click Select in the bottom right corner of the Media Library window to add it to the post/page.

You can also go to your blog’s Dashboard > Media > Instant Images, to browse and add images to your library.

Instant Images open in Vivaldi blog's post editor.