Tip #184

Hover your mouse over the Tab Bar and scroll to switch tabs.

In Tip #53 we told you how to switch tabs with right-click and scroll. In this post we’re sharing another tab switching option using your mouse’s scroll wheel.

To use the feature:

  1. Go to Settings > Tabs > Tab Features > Tab Cycling.
  2. Enable Switch Tabs by Scrolling.

To switch tabs:

  1. Hover your mouse cursor over the Tab Bar.
  2. Use the mouse’s scroll wheel to go through the list of open tabs.

Tip #183

Combine Vivaldi on Windows with Razer Chroma to make browsing more immersive and personal.

If Santa brought you new Razer Chroma gear for your computer, you can include Vivaldi in the color play. When Razer Chroma devices have been connected, your Theme‘s accent color will be reflected on the devices.

To enable Razer Chroma integration:

  1. Make sure your Chroma devices are connected to your computer.
  2. Go to Settings > Themes > Razer Chroma Theme Integration.
  3. Click Enable Razer Chroma Integration.
  4. Select the devices you want to sync with Vivaldi.

Make it more fun by enabling Accent from Page in your active theme’s settings or by setting up theme scheduling.

Tip #182

Follow accounts on Vivaldi Social and other Mastodon instances with Vivaldi Feeds.

If you don’t feel like going to Mastodon regularly to see what people you like post, you can have their posts come to you in the Vivaldi Browser by subscribing to their content with Vivaldi Feeds.

To add a Mastodon account to Vivaldi Feeds:

  1. Open the profile of the account you want to follow. Make sure the profile is open on its own instance. It’s not possible to subscribe to a feed when viewing it through a different instance.
  2. In the Address Field, type .rss at the end of the URL.
  3. On the feed preview page, click Subscribe.
  4. If you wish, update the feed title and refresh interval.
  5. Click Add Feed.

Tip #181

Enable Reader View before printing to remove the clutter and print only the important content.

Many websites, especially news sites, strip the printable page of irrelevant content. In case the web page you’re trying to print doesn’t do that, you can switch to Reader View, which will remove unnecessary sections and lets you print just the article. In addition, by using Reader View, you can adjust the font, font size, and line height before printing.

Here are the steps:

  1. Open the page you want to Print.
  2. Enable Reader View from the button on the right side of the Address Field.
  3. If needed, adjust the text from Reader View settings in the top right corner.
  4. Open the Print menu from Vivaldi menu > File > Print (Ctrl + P / ⌘ P).
  5. Review print settings.
  6. Click Print.
Normal Print preview open in Vivaldi Browser.
Normal Print preview of a web page
Print preview in Vivaldi Browser with Reader View enabled on the page before opening Print preview.
Print Preview of a page that has Reader Mode enabled.

Tip #180

Browse with Vivaldi on Android in multiple windows just like on desktop.

Android 12 and up supports opening multiple windows of the same app. This means that if you have a newer mobile device, you can browse with Vivaldi in multiple windows just like on desktop.

Multiple windows are supported better on devices with larger screens, such as tablets. To open a new window on a tablet or a phone with a width larger than 600dp:

  1. Open the Vivaldi menu.
  2. Select New Window.

Though not as convenient, you can open a new window on a smaller screen by following these steps:

  1. Open Vivaldi.
  2. Open your device’s app switcher.
  3. Long-press on the Vivaldi logo above the app preview thumbnail to open a split-screen view.
  4. Search for Vivaldi and tap on it to open a new window in the other half of the split screen.
  5. Exit split screen view, for example, by swiping the divider all the way up or down the screen.

When checking the app switcher, you’ll see Vivaldi listed twice or more, if you’ve opened even more windows.

Check out the Help page about Windows on Android to learn more about managing windows on your mobile device.

Vivaldi on Android on a tablet with the main menu open and window related options highlighted.

Tip #179

Light or dark? Choose the theme you prefer on the Vivaldi Forum.

Whether dark mode is easier on your eyes or you just enjoy the aesthetic, you now have the option to switch between light and dark themes also on the Vivaldi Forum.

To switch themes on the Forum:

  1. Click on your avatar in the top right corner and select Settings from the menu.
  2. In Select a Skin section, select your preferred Theme – Default (light) or Dark.
  3. Scroll to the bottom of the page and click Save Changes.

Tip #178

Use Quick Commands for quick calculations.

Quick Commands are a treasure box of options. You can use it to search, execute commands and also to do simple calculations.

To get an answer to an easy math problem:

  1. Open Quick Commands by pressing F2 / ⌘ E on your keyboard.
  2. Start typing the equation.

As soon as an equation is recognized the answer will be automatically displayed. Press Enter or click on the highlighted line below the text field to copy the answer.

Tip #177

Make new tabs take their place among open tabs where you expect to see them.

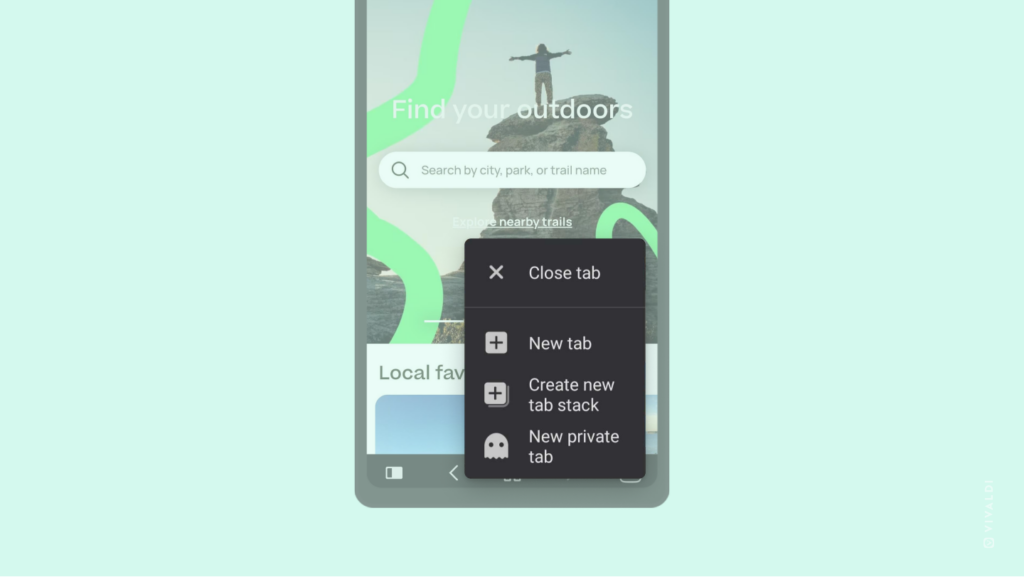
Both on Vivaldi on desktop and Vivaldi on Android, you have a few options for the location of newly opened tabs. To change where the new tab opens, go to Settings > Tabs > New Tab position either on desktop or Android. Then choose between the following options:

  • After Related Tabs: The new tabs will share a “parent-child” relationship – if you open a link in your current tab, the new tab will open next to its “parent”.
  • After Active Tab: Opens new tab next to the current active tab (this is the default).
  • As Last Tab: Opens new tab at the end of the tabs.
  • As Tab Stack With Related Tab: Opens a new tab stack with the active tab and the new tab.

Tip #176

Check the status and availability of Vivaldi’s online services on vivaldistatus.com.

Whether we’re doing scheduled maintenance or servers are acting up despite all the love we give them, there’s always a chance that Vivaldi’s online services will be temporarily unavailable. With scheduled maintenance we notify our users ahead of time via email* and notifications on the website, so downtime wouldn’t come as a surprise. With unexpected outages our system administrators do their best to get things back up again as fast as possible.

If you’re having trouble accessing and using Vivaldi services, it’s good to check our status page on https://vivaldistatus.com, to confirm whether the services are operational or there’s something going on.

*Make sure you’re subscribed to Technical Updates on your account’s profile on Vivaldi.net.

Tip #175

Enable Zoom Controls to change the page zoom level in Web Panels.

Web Panels are customizable Tabs which allow you to keep your favorite sites easily accessible in the side Panel of Vivaldi. And just like with web pages open in a tab, you can adjust the zoom levels for web pages added to Web Panels as well.

To increase or decrease the size of the content in Web Panels:

  1. Right-click on a Web Panel.
  2. Select Toolbar > Display Zoom Controls from the context menu.
  3. Then click on the zoom buttons  and  at the top of the Web Panel to zoom in and out.

Zoom level is retained through closing and reopening of the Web Panel and browser restarts.

A Web Panel open in Vivaldi with zoom controls highlighted.

Tip #174

Add alternative text to images you post on Vivaldi Social and Community Blogs.

Alternative or alt text is a short description of what is shown on the image. It is shown when the image can’t be displayed and is indexed by search engines. More importantly, alt text is used by screen reader software that helps visually impaired people browse the web. To contribute to making the web accessible for everyone, it’s strongly encouraged to add proper alt text to any images accompanying your posts on Vivaldi Social, Community Blogs on Vivaldi.net and other places on the web.

To add alt text to images you post on Vivaldi Social:

  1. Add an attachment to your post.
  2. Click on Edit in the top right corner of the image preview.
  3. Enter a description.
  4. Click Apply.

To add alt text to images in your blog posts:

  1. Upload or add an image from the Media Library to your blog post.
  2. Select the image.
  3. In block settings on the right side, look for Image Settings.
  4. Enter a description in the Alt text (alternative text) section.

Keep the description brief. If the image has text, it’s good to include it in the description. There’s no need to add alt text, if the image is only decorative and not related to the content.

Media editing window on Vivaldi Social with an example image and description.
Adding a description to an image on Vivaldi Social

Tip #173

Get a reality check on how many trackers and ads actually follow you on the web from Privacy Statistics.

When you have Vivaldi’s Tracker and Ad Blocker enabled, you can take a look at how many trackers and ads have been blocked while you’ve been browsing with Vivaldi.

To see how many trackers and ads have been blocked on the website you’re on, click on the Content blocker button on the left side of the Address Field.

To see overall statistics, head over to the Start Page and take a look at the Privacy Statistics bar near the top. Click on it to see details.

In case you’ve disabled Privacy Statistics, you can use Quick Settings accessible from the top right corner of Start Page to enable them again.

Tip #172

Make the menu bar in Vivaldi on Android’s main menu work for you.

You can tailor the menu bar in Vivaldi’s main menu to fit your individual workflow.

To customize the menu bar:

  1. Go to Vivaldi menu > Settings > General > Main Menu.
  2. Opt for one of the two presets or select Customize layout to make your own configuration.
  3. Using drag and drop, reorder the options in the list, so the top 5 menu items are the ones you want to see on the menu bar.

Tip #171

Find similar images with reverse image search.

When you come across an image on a web page or have one saved and you want to find similar images or track down the original source and author of the image, you can use reverse image search.

To search with an image:

  1. Open the web page with the image or open an image stored on your computer from Vivaldi menu > File > Open File.
  2. Right-click on the image to open the context menu.
  3. Select Search for Image.

To change the Image Search Engine:

  1. Go to Settings > Search > Image Search Engine.
  2. Select your preferred search engine from the dropdown menu.

Currently, the search can be done using either Bing’s or Google’s image search. If you know any other search engines that offer searching with an image, you can add them as a new search engine. Make sure to fill out the Image Search URL and Image Search POST Parameters info.

A web page with an image in Vivaldi Browser. Right-click context menu is opened and highlighted.