Tip #581

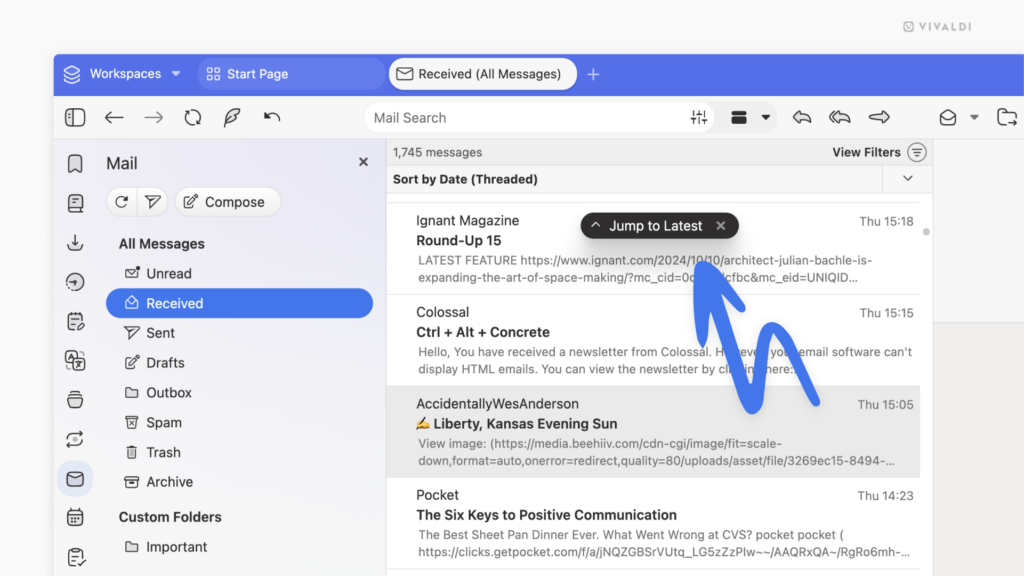
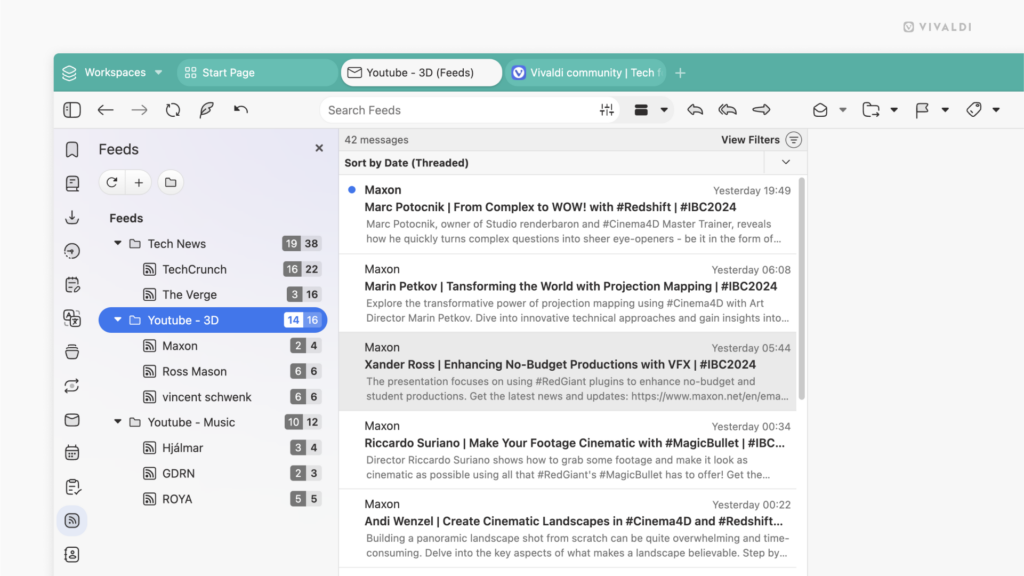
Make your choice between spacious and compact user interface layouts.

Do you prefer to give the buttons on the toolbars plenty of breathing room, or do you want them packed together nice and snug next to each other? As with most things in Vivaldi, you’re in control and can decide what works best for you.

To change the UI density:

  1. Go to Settings > Appearance > Window Appearance > User Interface Density.
  2. Choose between:
    • Regular i.e. the more spacious layout, and
    • Compact layout.

Tip #580

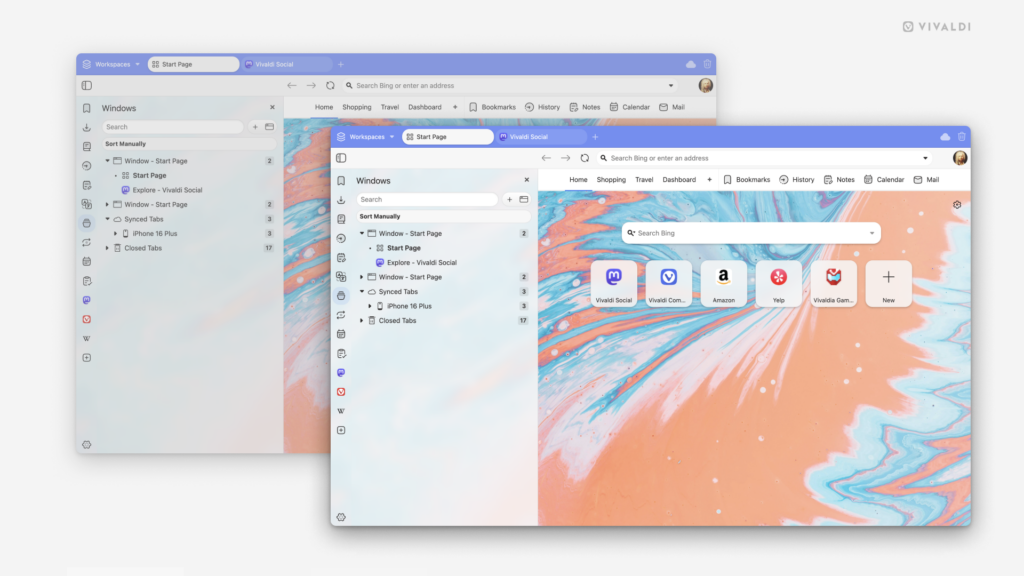
Fade the user interface colors of the browser windows you have open in the background.

When you’re viewing multiple browser or app windows side by side, it can be difficult to see, which one you’ve focused on. Fading Vivaldi window’s colors when it’s not in focus helps to make it more obvious.

To enable background window color fading:

  1. Go to Settings > Appearance > Window Appearance.
  2. Enable “Fade Colors in Background Windows”.
Two Vivaldi browser windows. The one in the back has a faded color scheme compared to the one in the foreground.

Tip #578

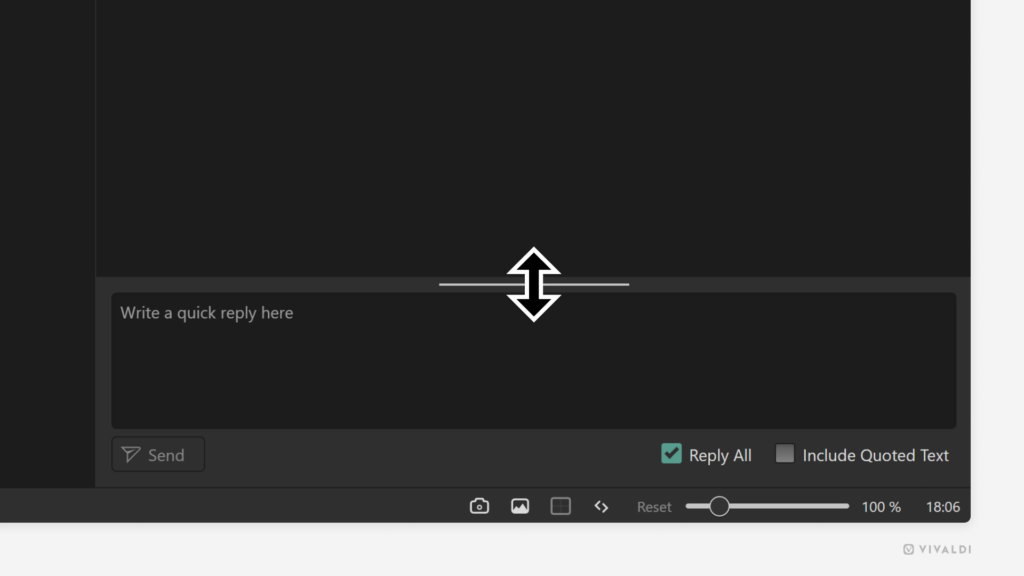
Click and drag to easily resize or minimize Vivaldi Mail’s Quick Reply.

Is your quick reply email getting longer than expected or do you temporarily want to hide it altogether?

To resize the Quick Reply field:

  1. Place the mouse cursor on the top edge of the Quick Reply section.
  2. Click and drag upwards to expand the area and downwards to make it smaller. Drag all the way down towards the bottom edge of the window to minimize it altogether.
Corner of the Vivaldi browser window showing the Quick Reply area in Vivaldi Mail. A mouse cursor is placed at the line that allows to resize Quick Reply.

Tip #577

Give your Speed Dial folders a personalized look by adding custom thumbnails.

In addition to individual Speed Dial bookmarks, you can add thumbnails to Speed Dial folders (see Tip #69).

To add a custom thumbnail image to a bookmark folder:

Option 1

  1. Open the Start Page.
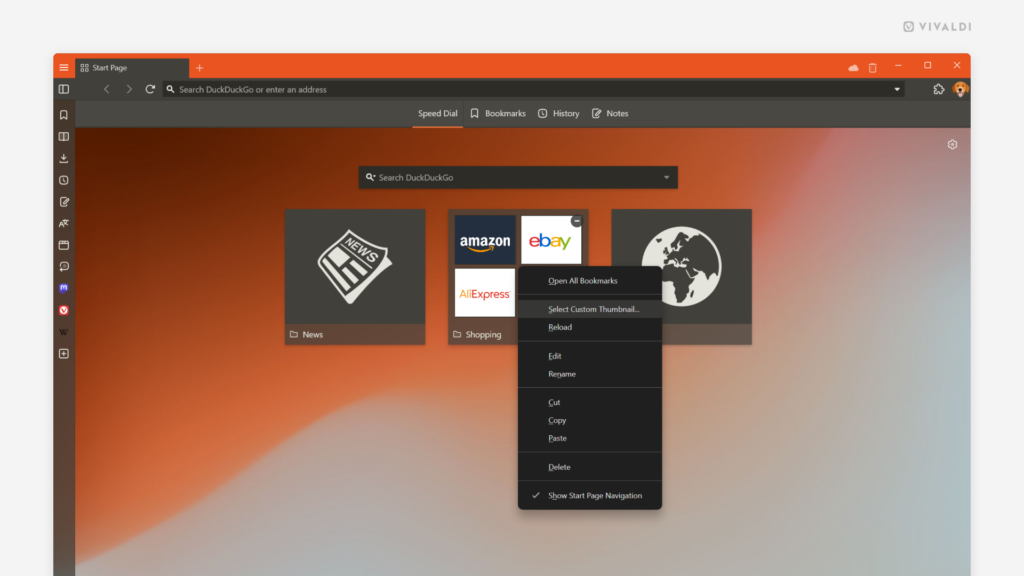
  2. Right-click on a folder and select “Select Custom Thumbnail”.
  3. Locate the image file you want to use.
  4. Click “Open”.

Option 2

  1. Open the Bookmarks Panel or Bookmarks Manager.
  2. Select the bookmarks folder.
  3. In the information section (name, nickname, description), hover over the folder icon.
  4. Click on “Select Custom Thumbnail”.
  5. Locate the image file you want to use.
  6. Click “Open”.

The recommended image size is 440×360px and most image formats, including animated GIFs, are supported.

Vivaldi Browser window open on a Start Page. Bookmark folder's context menu is open to show the "Select Custom Thumbnail" option.

Tip #574

Select the default search engine for image search.

Reverse image search is a great way to find similar images to the one you’re currently viewing. Just right-click on the picture and select “Search for image” (sometimes the option can be in the “Image” subfolder).

The results will be provided by your default image search engine, so pick the one you want to see results from.

To review your settings:

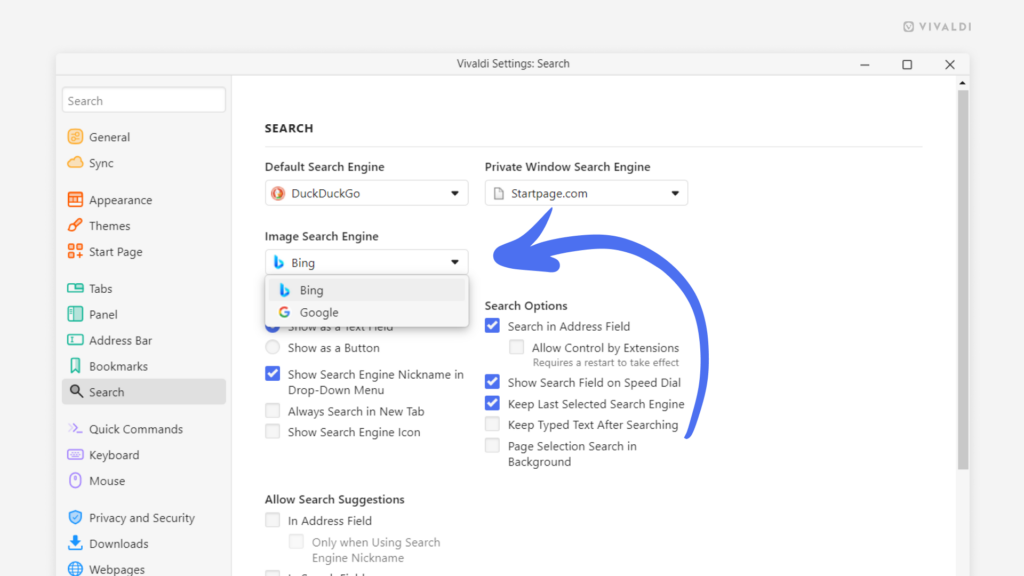
  1. Go to Settings > Search > Image Search Engine.
  2. Select, whether you want to get results from Bing, Google, or a search engine you’ve added yourself.
Vivaldi Search Settings with an arrow pointing at Image Search Engine setting.

Tip #573

To sync or not to sync? You decide what browsing data is synchronized across all your devices.

Bookmarks, Tabs, Passwords, Notes, History, etc. – you can easily access all of it and more in Vivaldi on all your devices when you use the Sync feature. But, whether you sync all data or just some of it, is up to you.

To sync selected data:

  1. Go to Settings > Sync.
  2. Log in to your account and enter the encryption password.
  3. Go to “Sync Selected Data”
  4. Toggle on and off the data types you want to Sync.
  5. Click “Apply Changes”.
  6. Do the same on all devices.

Tip #571

Turn off Address Field Drop-Down Menu for more private browsing.

Do you often show things on the web to someone sitting next to you and discover yourself thinking that you’d prefer if they couldn’t see your previous searches, history, and more? A great solution for that is to disable the Address Field Drop-Down menu. That way, matching suggestions won’t be displayed as you type a search term or a link in the Address Field.

To disable the Address Field Drop-Down Menu:

  1. Go to Settings > Address Bar > Drop-Down Menu.
  2. Disable “Show Drop-Down when Typing”.
Address Bar Settings. An arrow is pointing at the "Show Drop-Down when Typing" setting.

Tip #568

Start adding a new event in the Vivaldi Calendar by clicking and dragging to set the event’s length.

You can set a time for the event by typing or using the date and time picker in the event editor. But a much cooler option is to click and drag to fill the timeslot in the calendar that the event is going to take up. When you release the mouse button, the event editor will open, allowing you to fill out the rest of the event’s details.

Give it a go!

Tip #565

Install Vivaldi on Linux as a Snap package.

Vivaldi on Linux is available as rpm, deb, and ARM versions, and we’re continuing to actively investigate and experiment with Flatpak.

In addition, you can install Vivaldi as a Snap package, which makes it easier to install and update Vivaldi without worrying about your distro’s specifics. Click the button below or copy the following link https://snapcraft.io/vivaldi to download Vivaldi.

Download on Snapcraft

Learn more about Vivaldi for Snap on our Help page.

Vivaldi browser window with a "Download from the Snap store" button in the foreground.

Tip #564

Grab a recently downloaded file and drag-and-drop it where it needs to go.

In the Vivaldi Browser, you can drag files directly from the Downloads Panel or the Downloads Popup to your desktop, a folder, or even into an email or upload section on a web page.

To drag-and-drop files from Downloads:

  1. Open the Downloads Panel or Popup.
  2. Locate the file you want to use.
  3. Click and drag the file to where you need it.
  4. Release the mouse button to drop the file.

The next tip will be published on the 30th of September.

Downloads panel in Vivaldi browser. A file is being dragged out of the panel.

Tip #562

Switch between Reply and Reply All as you’re drafting the email message.

When you’re writing a reply email, do you sometimes reassess and decide that instead of replying to just the sender you should send the email to all recipients or vice versa? Luckily, in Vivaldi Mail, you don’t need to discard the draft and start again.

To switch between Reply and Reply All:

  1. Look to the “To” field in the email composer.
  2. Open the dropdown menu in front of the email address(es).
  3. Select Reply or Reply All/Reply List.
Vivaldi Mail's with an email draft open in the composer. An arrow is pointing at the dropdown menu where you can switch between Reply and Reply All.

Tip #560

Change the active tab’s location on the Tab Bar with Keyboard Shortcuts.

If the order of tabs on the Tab Bar is important to you, then you might be familiar with dragging tabs to reorder them. But did you know that you can also use Keyboard Shortcuts to do it?

To move the active tab:

  • Backward, i.e. to the left or up use Ctrl/⌘ + Shift + Page ↑.
  • Forward, i.e to the right or down use Ctrl/⌘ + Shift + Page ↓.

You can also type “Move Active Tab Backward/Forward” in Quick Commands.

Tip #559

Create a shortcut for toggling dark mode for web pages on and off.

Through Settings > Appearance > Website Appearance, you can choose to display all websites in dark mode all the time. Even if a website hasn’t provided a dark option for their website, you can have Vivaldi create it for them by forcing dark mode to be used. But occasionally even dark mode lovers need to turn on the lights temporarily. That’s where shortcuts come in handy.

To toggle dark mode on and off with shortcuts:

Quick Commands

  1. Open Quick Commands.
  2. Type “Toggle Force a dark mode on all websites’.
  3. Press “Enter”.

For the following you first need to create the shortcut.

Keyboard Shortcuts

  1. Go to Settings > Keyboard > View.
  2. Find “Toggle Force a dark mode on all websites’.
  3. Focus on the input field next to it and press the key combination you want to use as the shortcut.

Mouse Gestures

  1. Go to Settings > Mouse > Gesture Mapping.
  2. Click on “New Gesture: and find “Toggle Force a dark mode on all websites”.
  3. Click “Next”.
  4. While holding down the left mouse buttton, draw the gesture in the red box.
  5. Click “Save Gesture”

Toolbar button

  1. Go to Settings > Quick Commands > Command Chains.
  2. Click on “Add Command Chain”.
  3. Give the chain a name.
  4. For Command 1 select “Toggle Force a dark mode on all websites”.
  5. Go to Vivaldi menu > View > Customize Toolbar.
  6. Select Command Chains from the dropdown menu.
  7. Drag the new chain to a toolbar of your choice.

Context menu

  1. Go to Settings > Appearance > Menu.
  2. Select the menu you want to add the command to. For example Web Page > Page.
  3. From the Commands menu, search for “Toggle Force a dark mode on all websites”.
  4. Drag it to the Content column on the right.

Use the newly created shortcuts whenever you want to switch between light and dark mode.

Tip #558

Vivaldi’s Web Panels aren’t limited to just the mobile view. Learn how to get the desktop version.

Web Panels show you the mobile view of a web page. Some websites show pages on mobile much differently than on desktop or don’t even let you use some of the site’s functionality. Don’t let this stop you! Simply click on the “Switch to Desktop/Mobile View” button at the top of the panel and get to the content you’re after.

If things are a bit tight with the desktop view, check out Tip #15 and learn how to make the web panel wider without changing the size of the other Panels.

Vivaldi Browser with WhatsApp added as a Web Panel. An arrow is pointing at the button where desktop and mobile views can be switched.